
Portrait Lighting with Quadralite Reporter 360 TTL
Good portrait photography depends on proper lighting. It is essential not only for technical correctness but for creating a truly successful image. Spanish photographer Alberto Duran explains portrait lighting through a range of classic lighting setups.
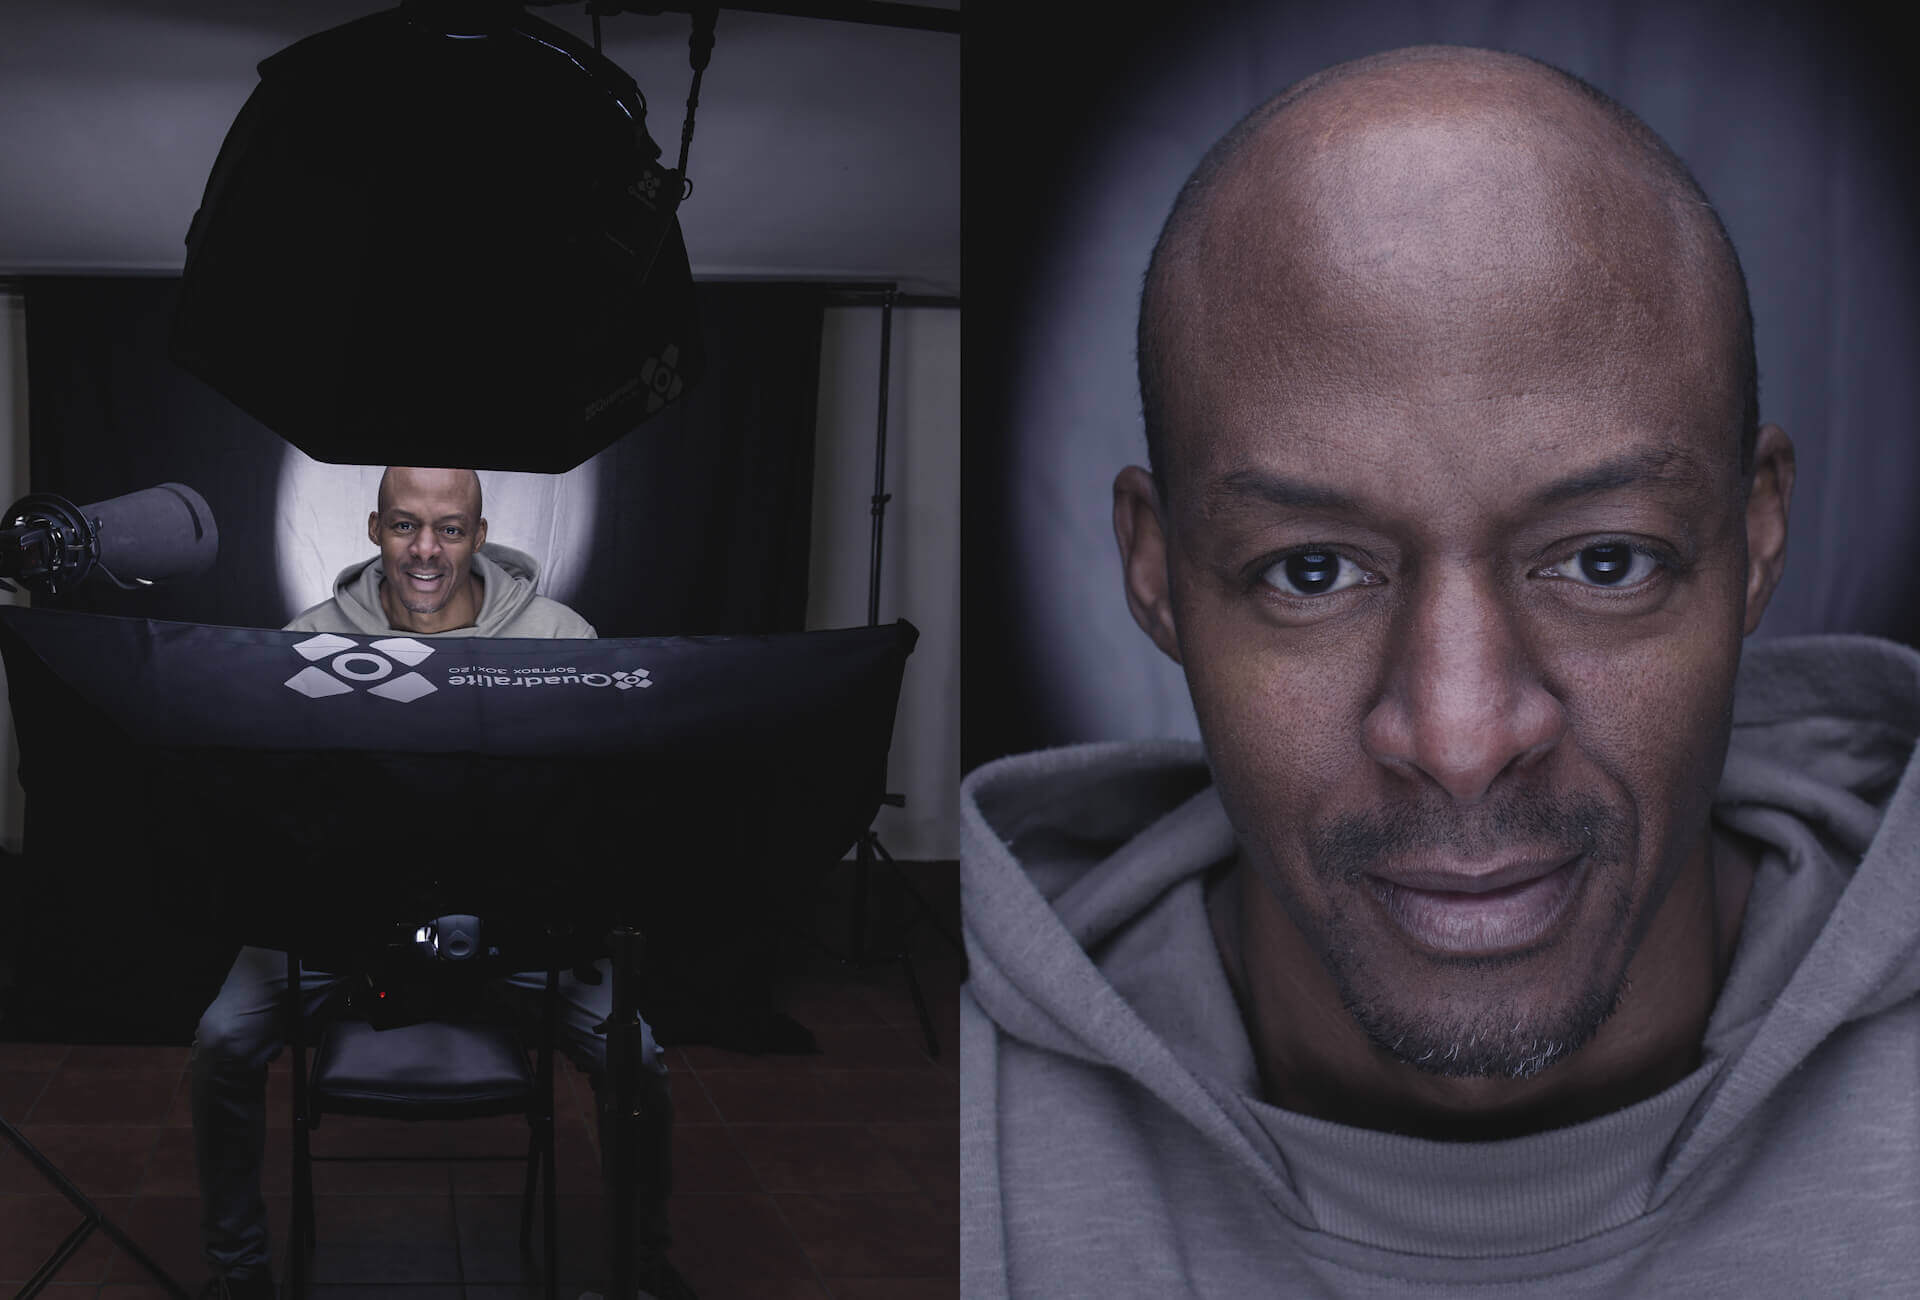
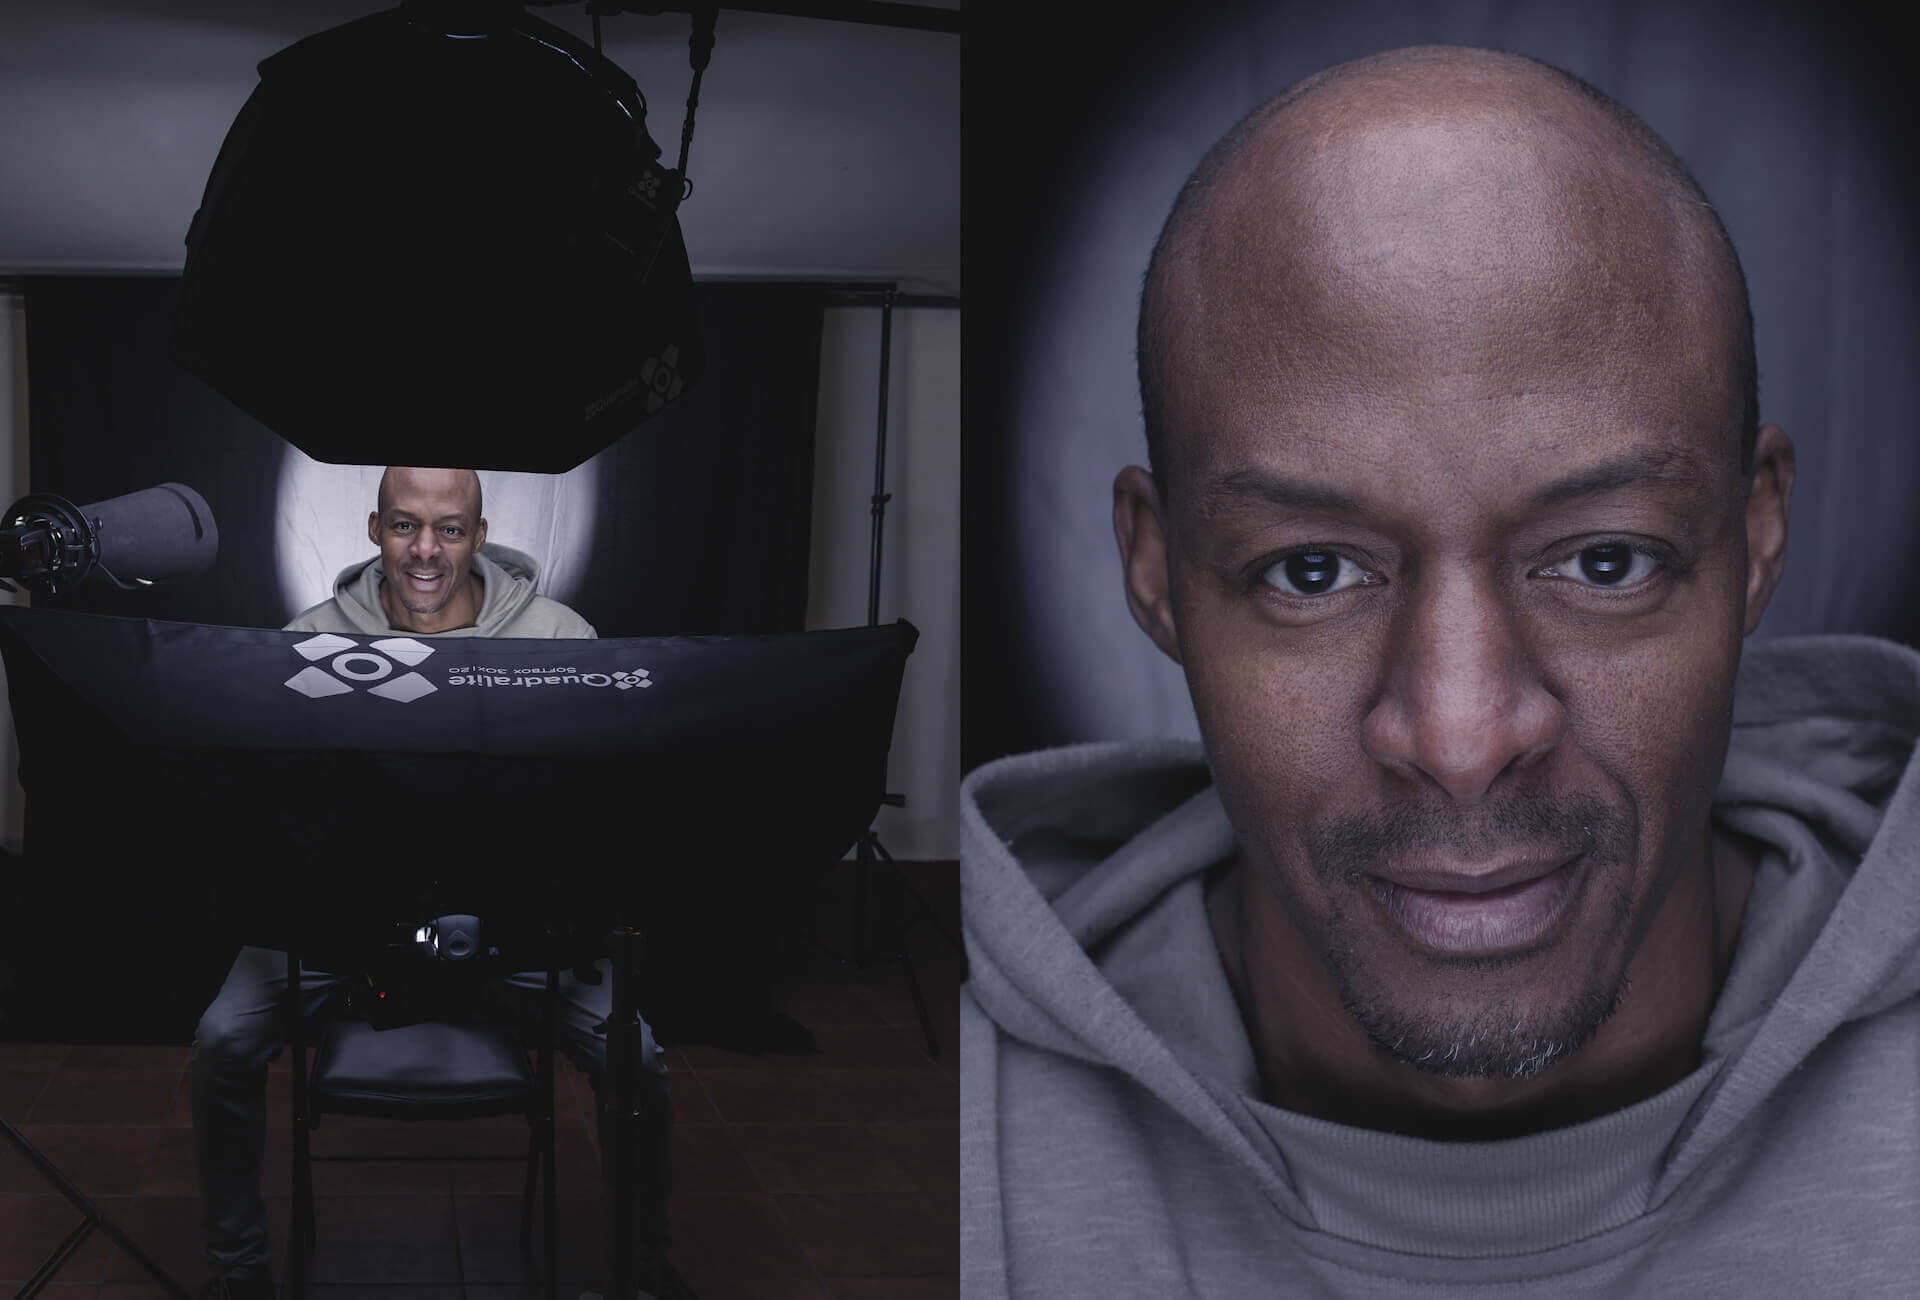
Good portrait photography depends on proper lighting. It is essential not only for technical correctness but for creating a truly successful image. Spanish photographer Alberto Duran explains how portrait lighting works by presenting a range of different lighting setups.
The world of portrait photography, especially studio portraiture, has always fascinated me. Lighting conditions determine the final effect and our ability to reveal the unique characteristics of the person being photographed.
I have long admired the work of Peter Hurley and Sue Bryce, but it was “Reunión Flecha” – a photography workshop organized in Santander, Spain – where I had the opportunity to meet Jon Usual and see him work, that renewed my desire to deepen my knowledge of portrait photography and flash lighting.
Training in flash lighting can be an important step on the path to becoming a professional photographer. Even after mastering the basics, however, we should remember two essential things that help us continue improving:
- know the characteristics of the equipment you work with,
- practice constantly and experiment until you master every tool.
While looking for the best tools for my own work, I tested many studio-lighting systems, from Starblitz to Profoto. In the end I chose the Quadralite Reporter 360 TTL, which I intend to use both in the studio and on location because of its exceptional mobility.
I invite you to look at several classic portrait-lighting setups. Toni volunteered to help test them, and I hope the results inspire you to create better photographs.
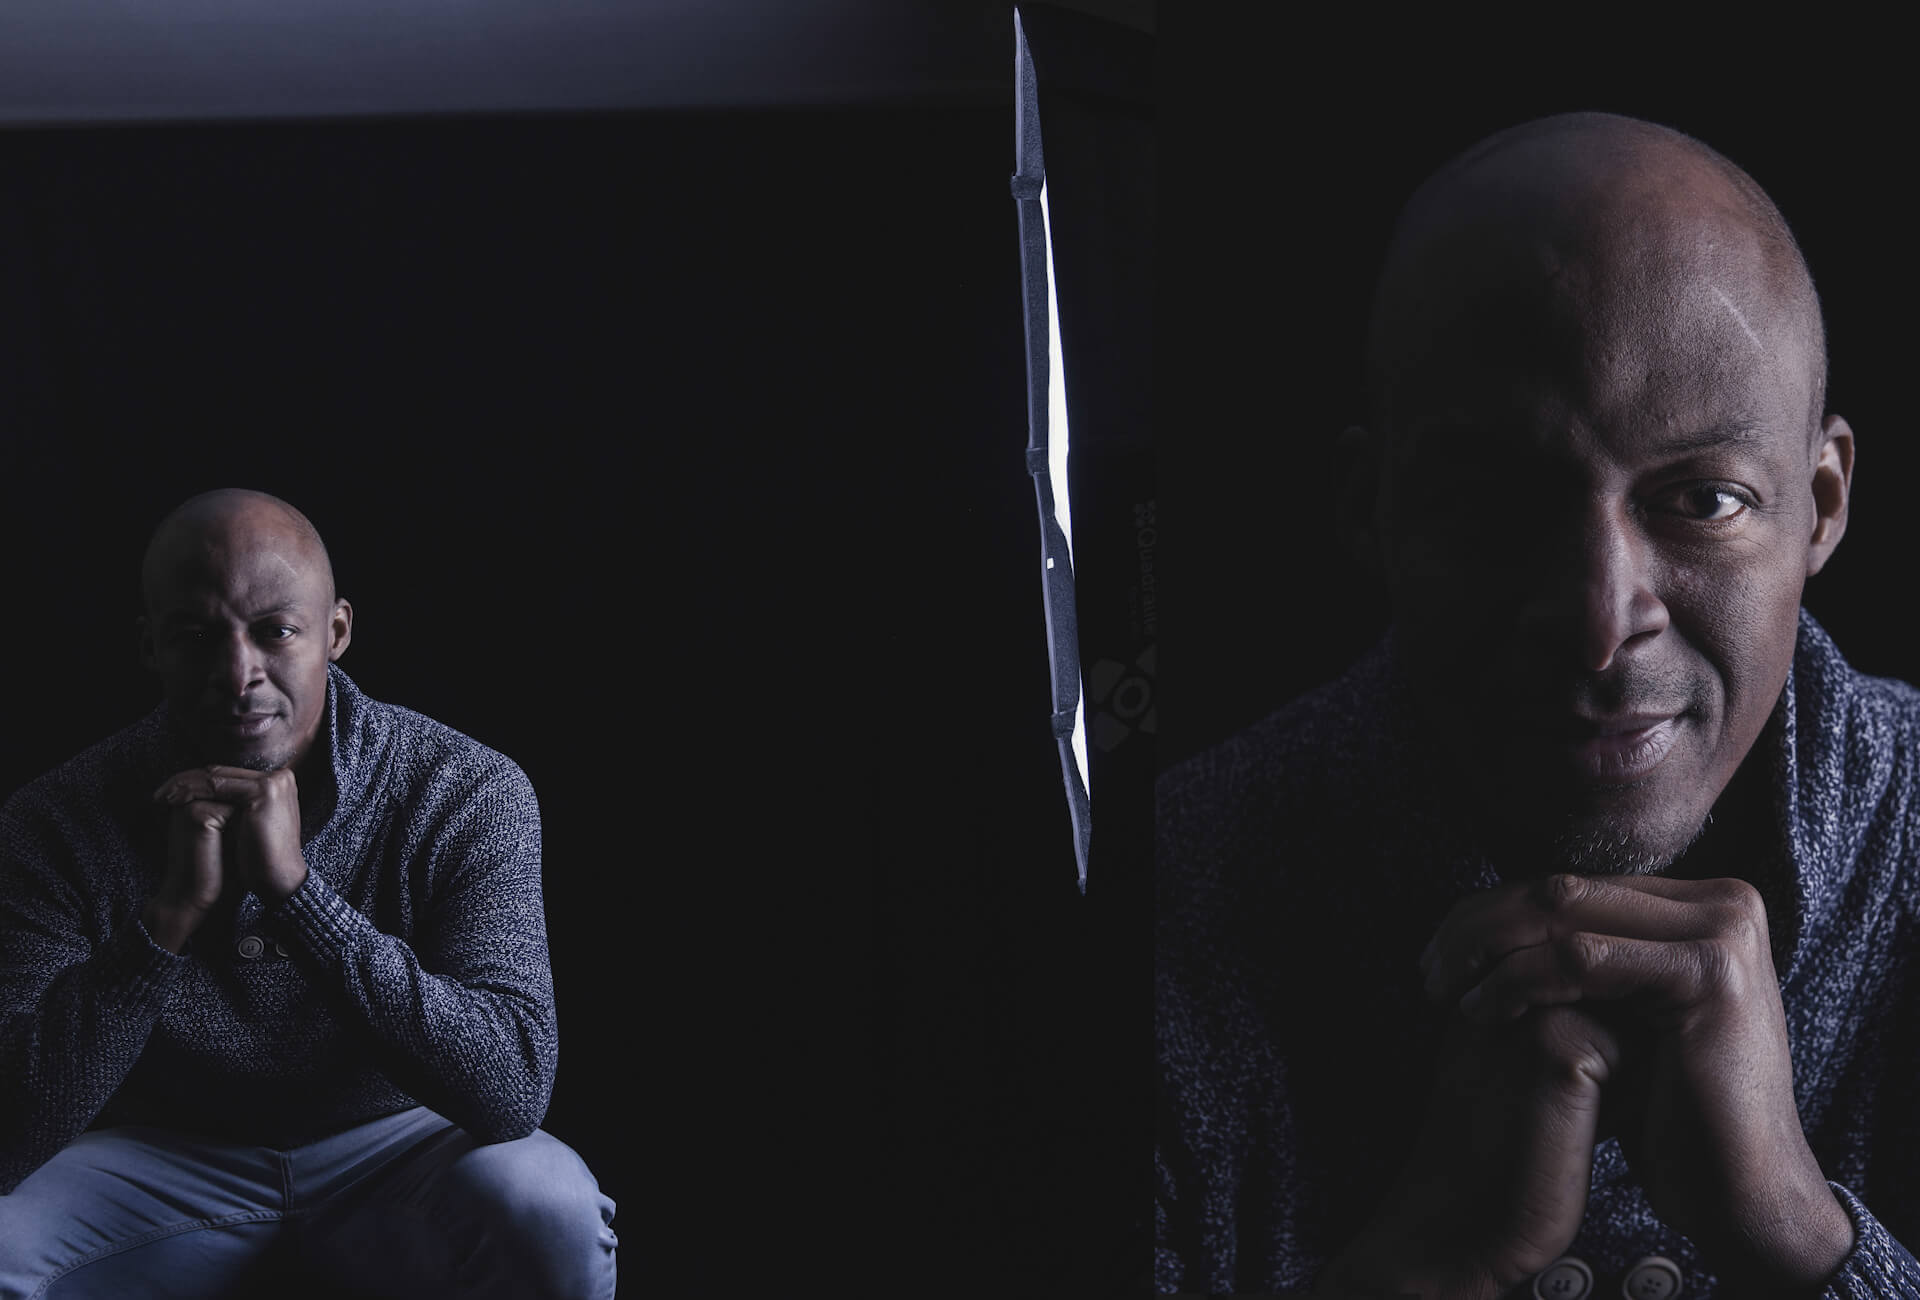
##### SIDE LIGHT (90°)
Place the light source at face height, 90 degrees to the model. Using a single source in this position creates strong shadows and is ideal for emphasizing detail and adding drama. Harder light can be achieved by removing the diffusion surface (and made harder still by removing another layer).
##### REMBRANDT LIGHTING (45°)
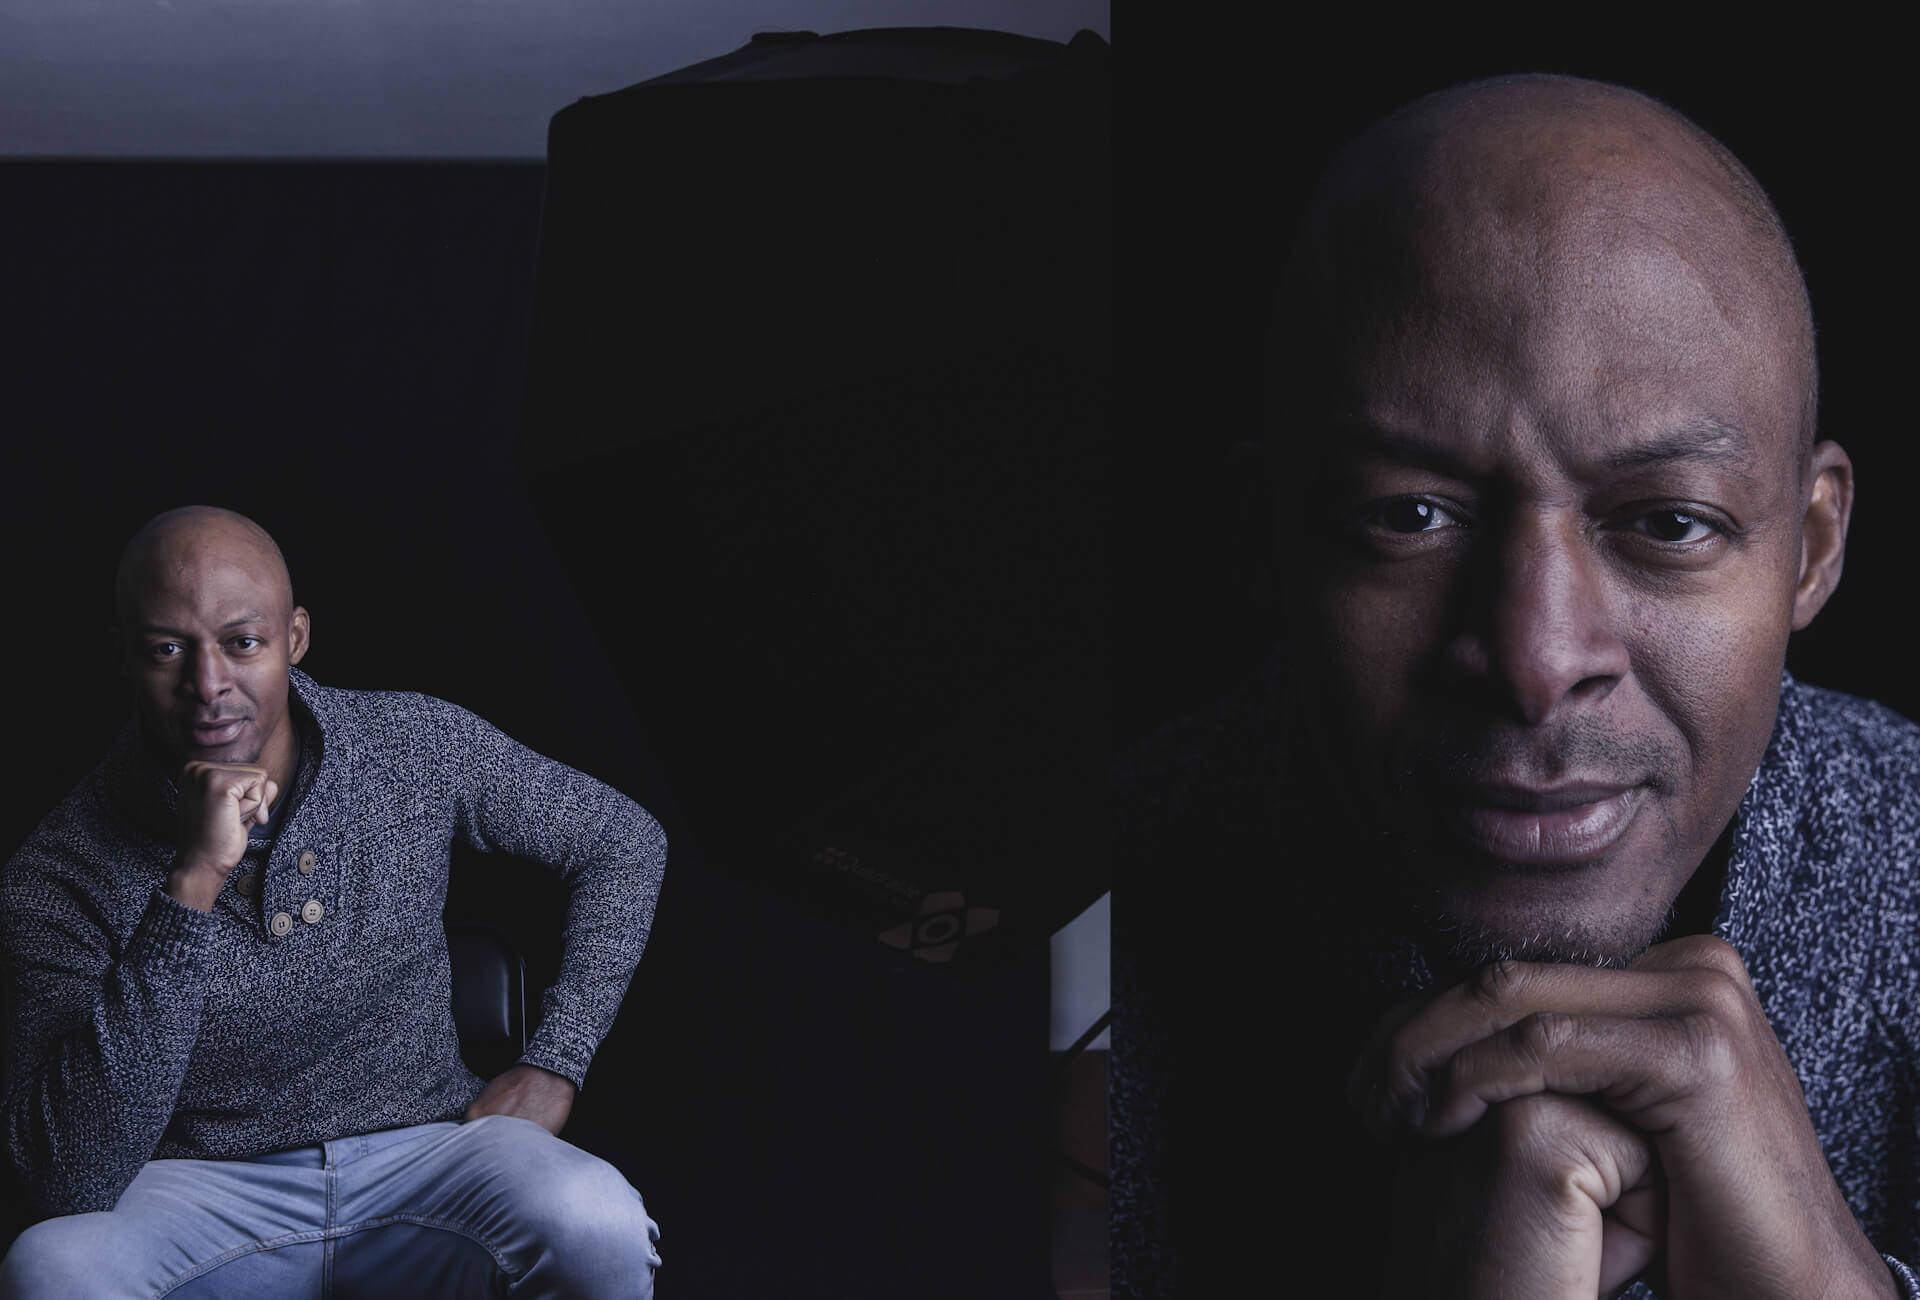
In this setup, position the light at approximately 45 degrees to the model’s nose. One half of the face remains in gentle shadow, with a characteristic small triangle of light on the cheek. This is the so-called Rembrandt triangle, named after the painter who often used this way of illuminating faces. Despite its apparent subtlety, the setup can produce very dramatic results.
For my photograph, I positioned the source slightly higher than in a classic Rembrandt setup, but the effect is exactly what I wanted.
##### LOOP LIGHTING
Keeping the light at roughly 45 degrees, raise it higher. The result lies between Rembrandt and Butterfly lighting.
When light reaches a larger area of the face, the skin can appear smoother while still retaining desirable shadows. Their softness depends on the modifier being used.
For easier comparison, I used an Octa with a diffusion surface.
This position produces a shadow beneath the nose that falls slightly diagonally away from the light source.
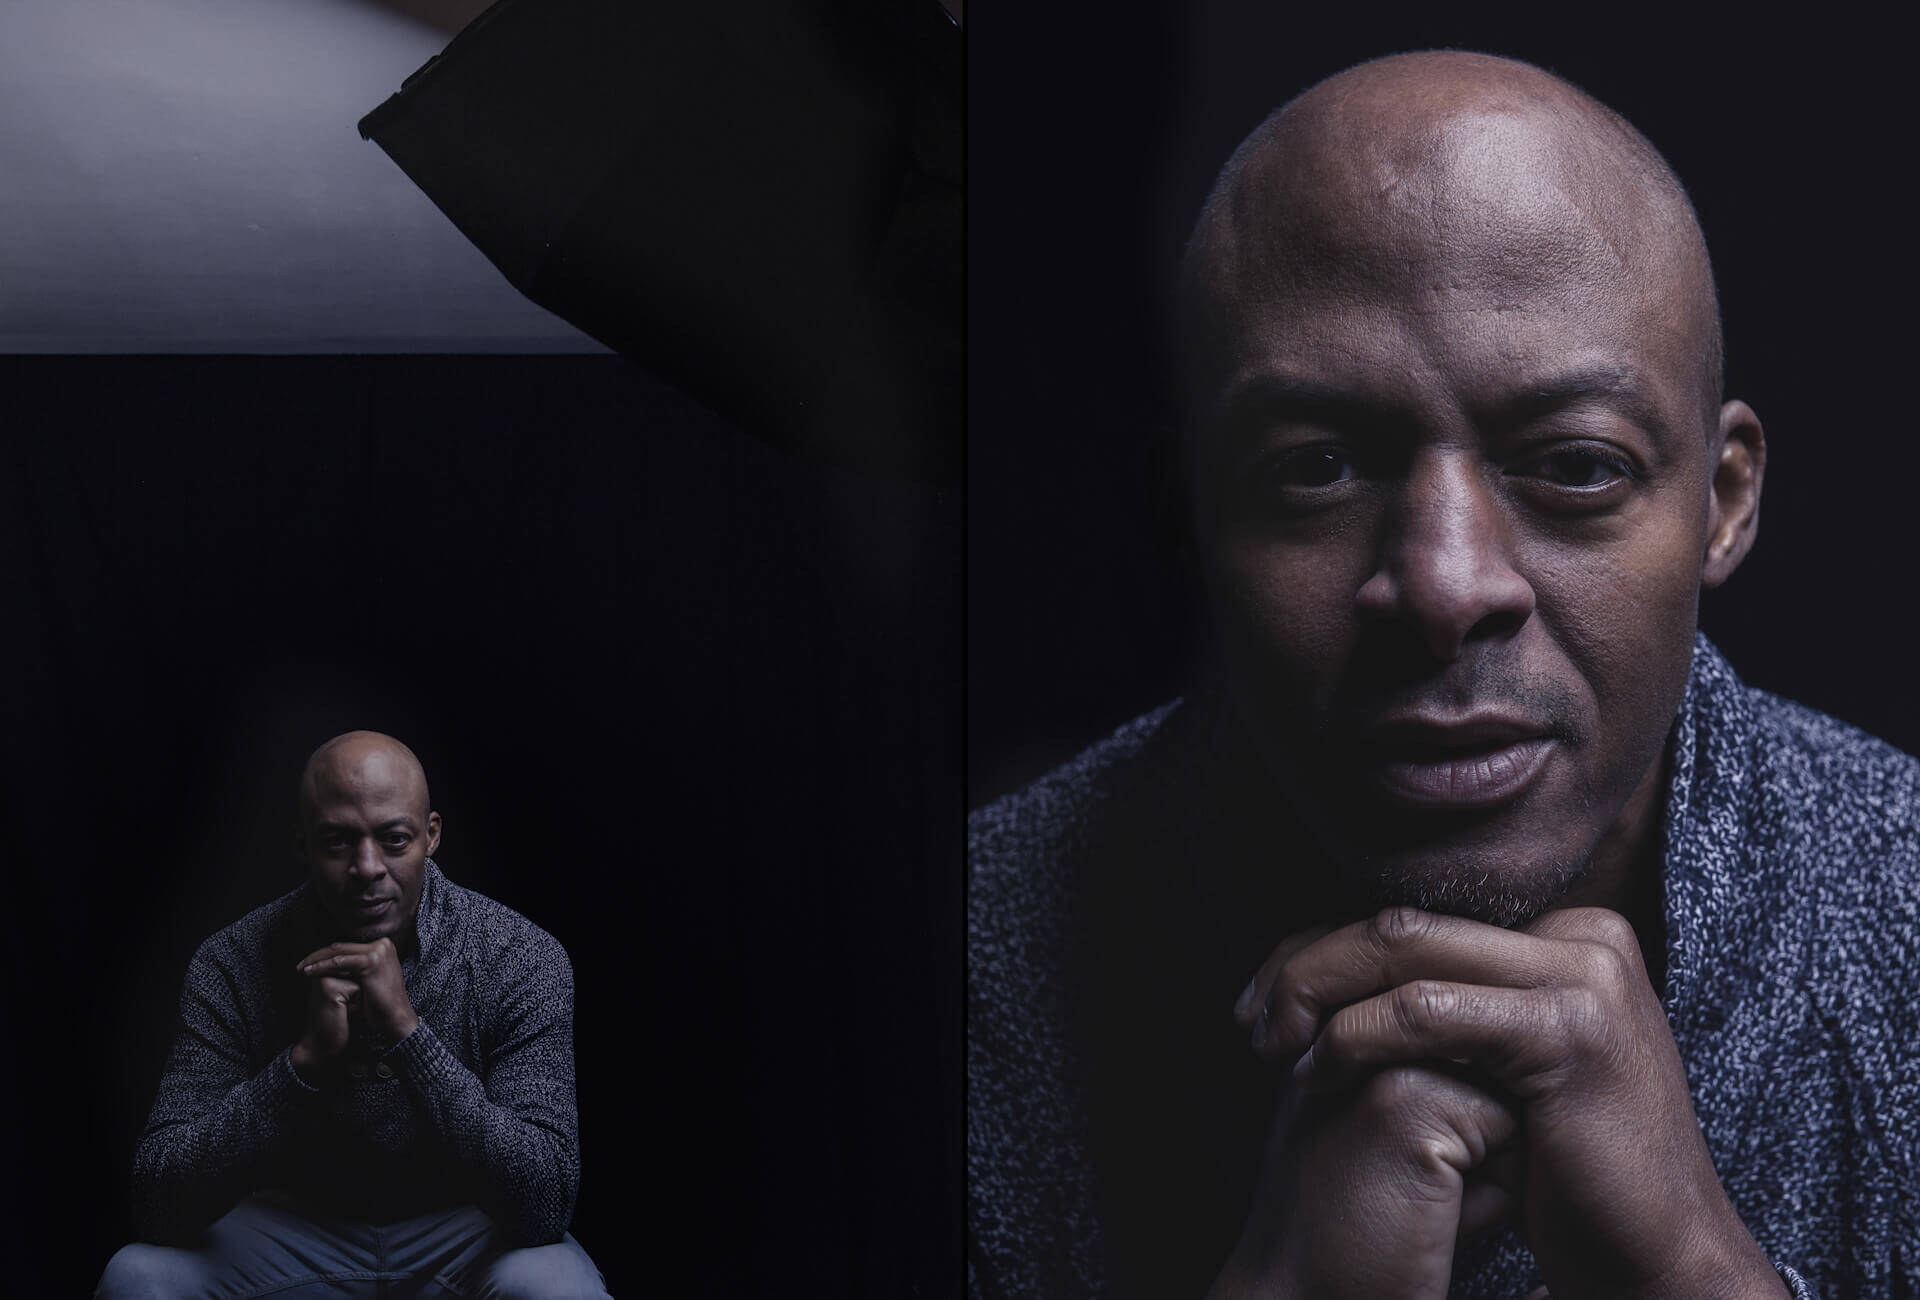
##### REMBRANDT + SIDE LIGHT
Starting from a Rembrandt setup, the shadows created by the main light can be softened by adding a lower-powered source on the dark side of the face. In the example I used a Quadralite 30×120 cm rectangular softbox with diffusion and a grid to keep the fill light focused where I wanted it.
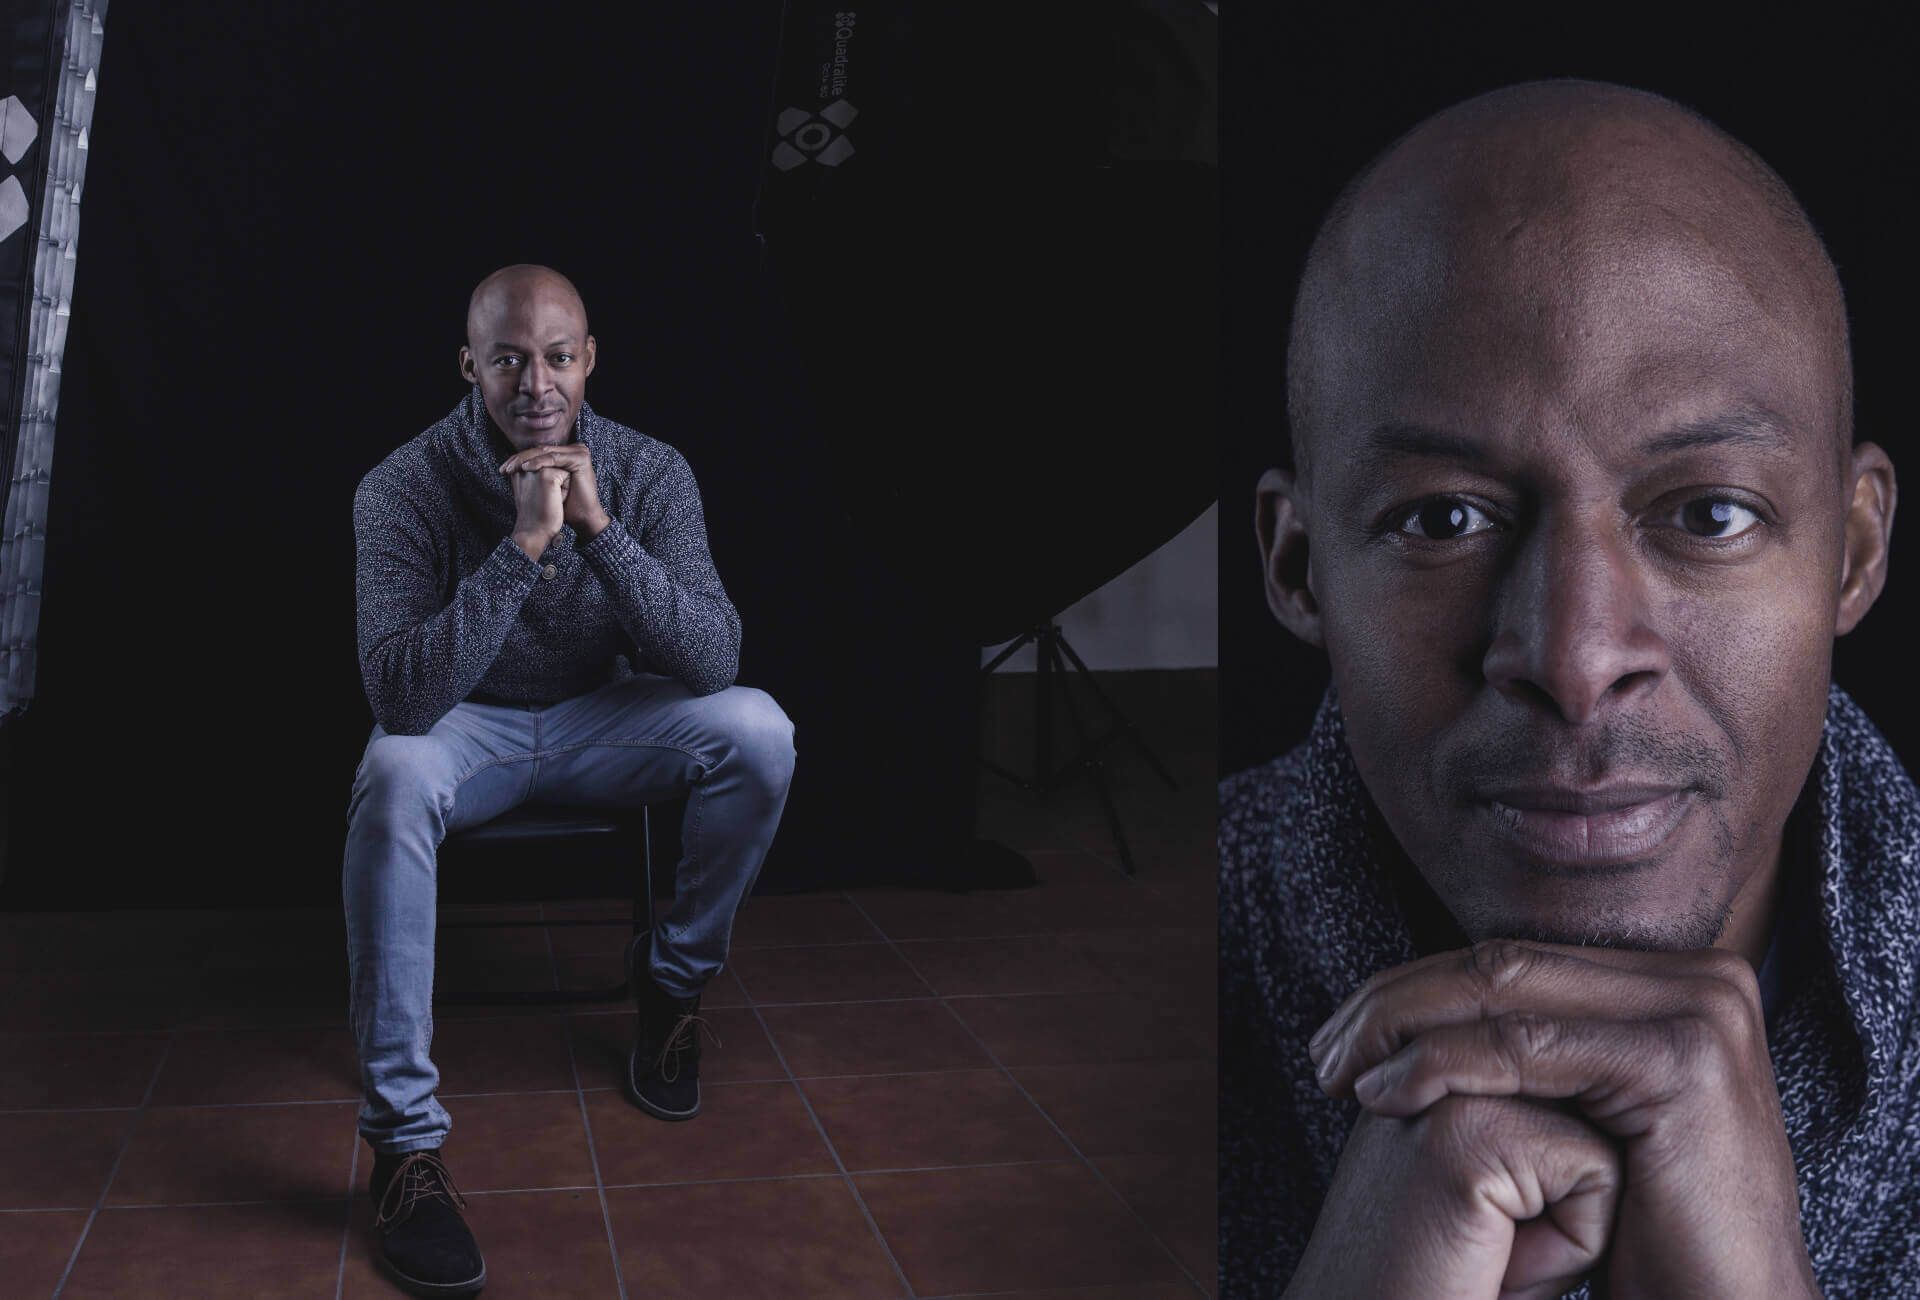
##### REMBRANDT + REAR SIDE LIGHT
When I want to emphasize distinctive facial features, I like adding a rim light. Here the rear light is placed opposite the main light and both units use the same power. This separates the subject from the background while preserving the characteristic Rembrandt look.
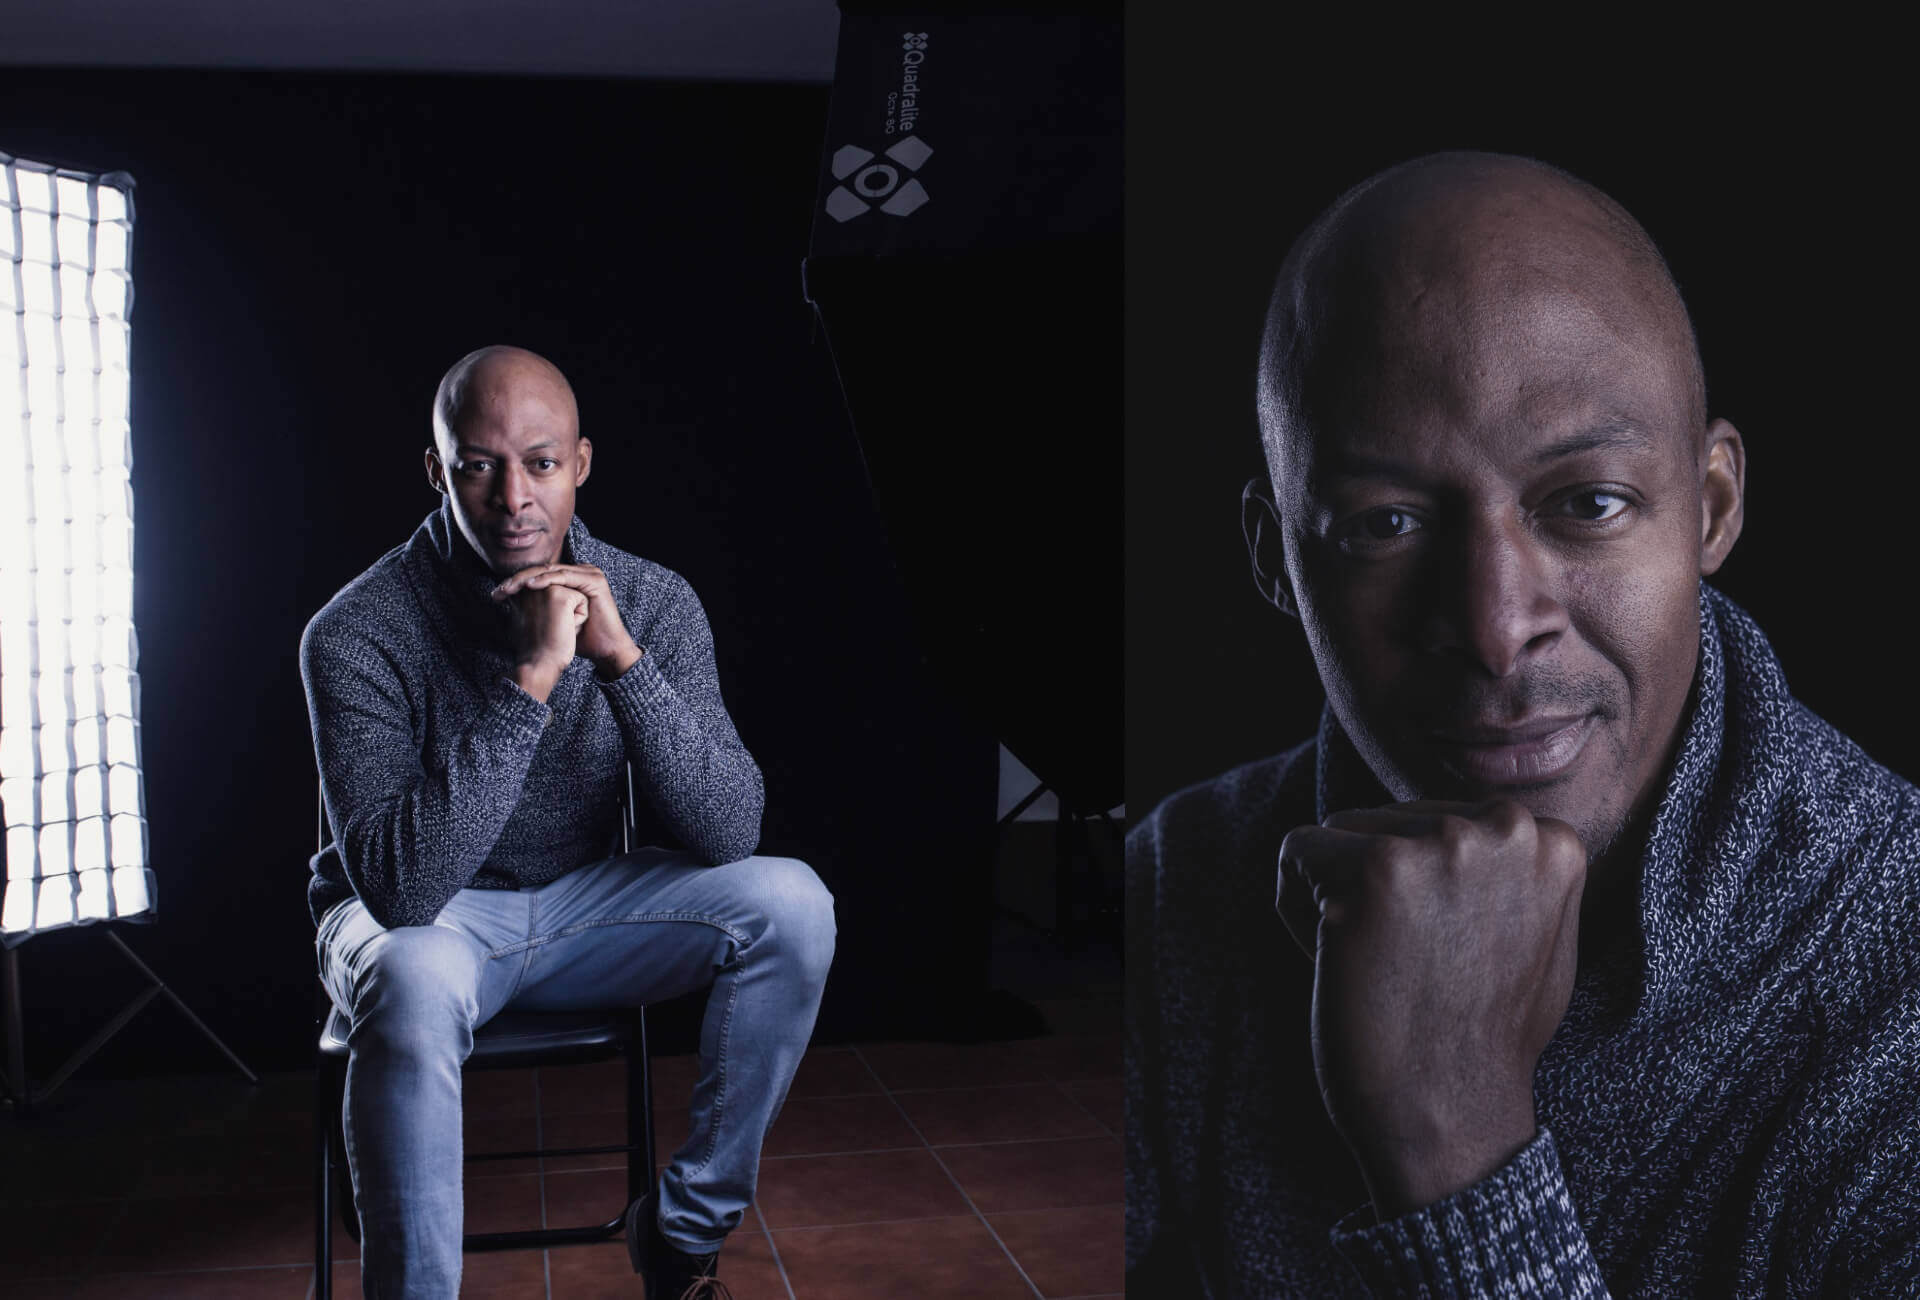
##### REMBRANDT + TWO RIM LIGHTS
Adding a third light source gives a great deal of control simply by adjusting output levels. This setup is particularly useful for commercial and business portraits.
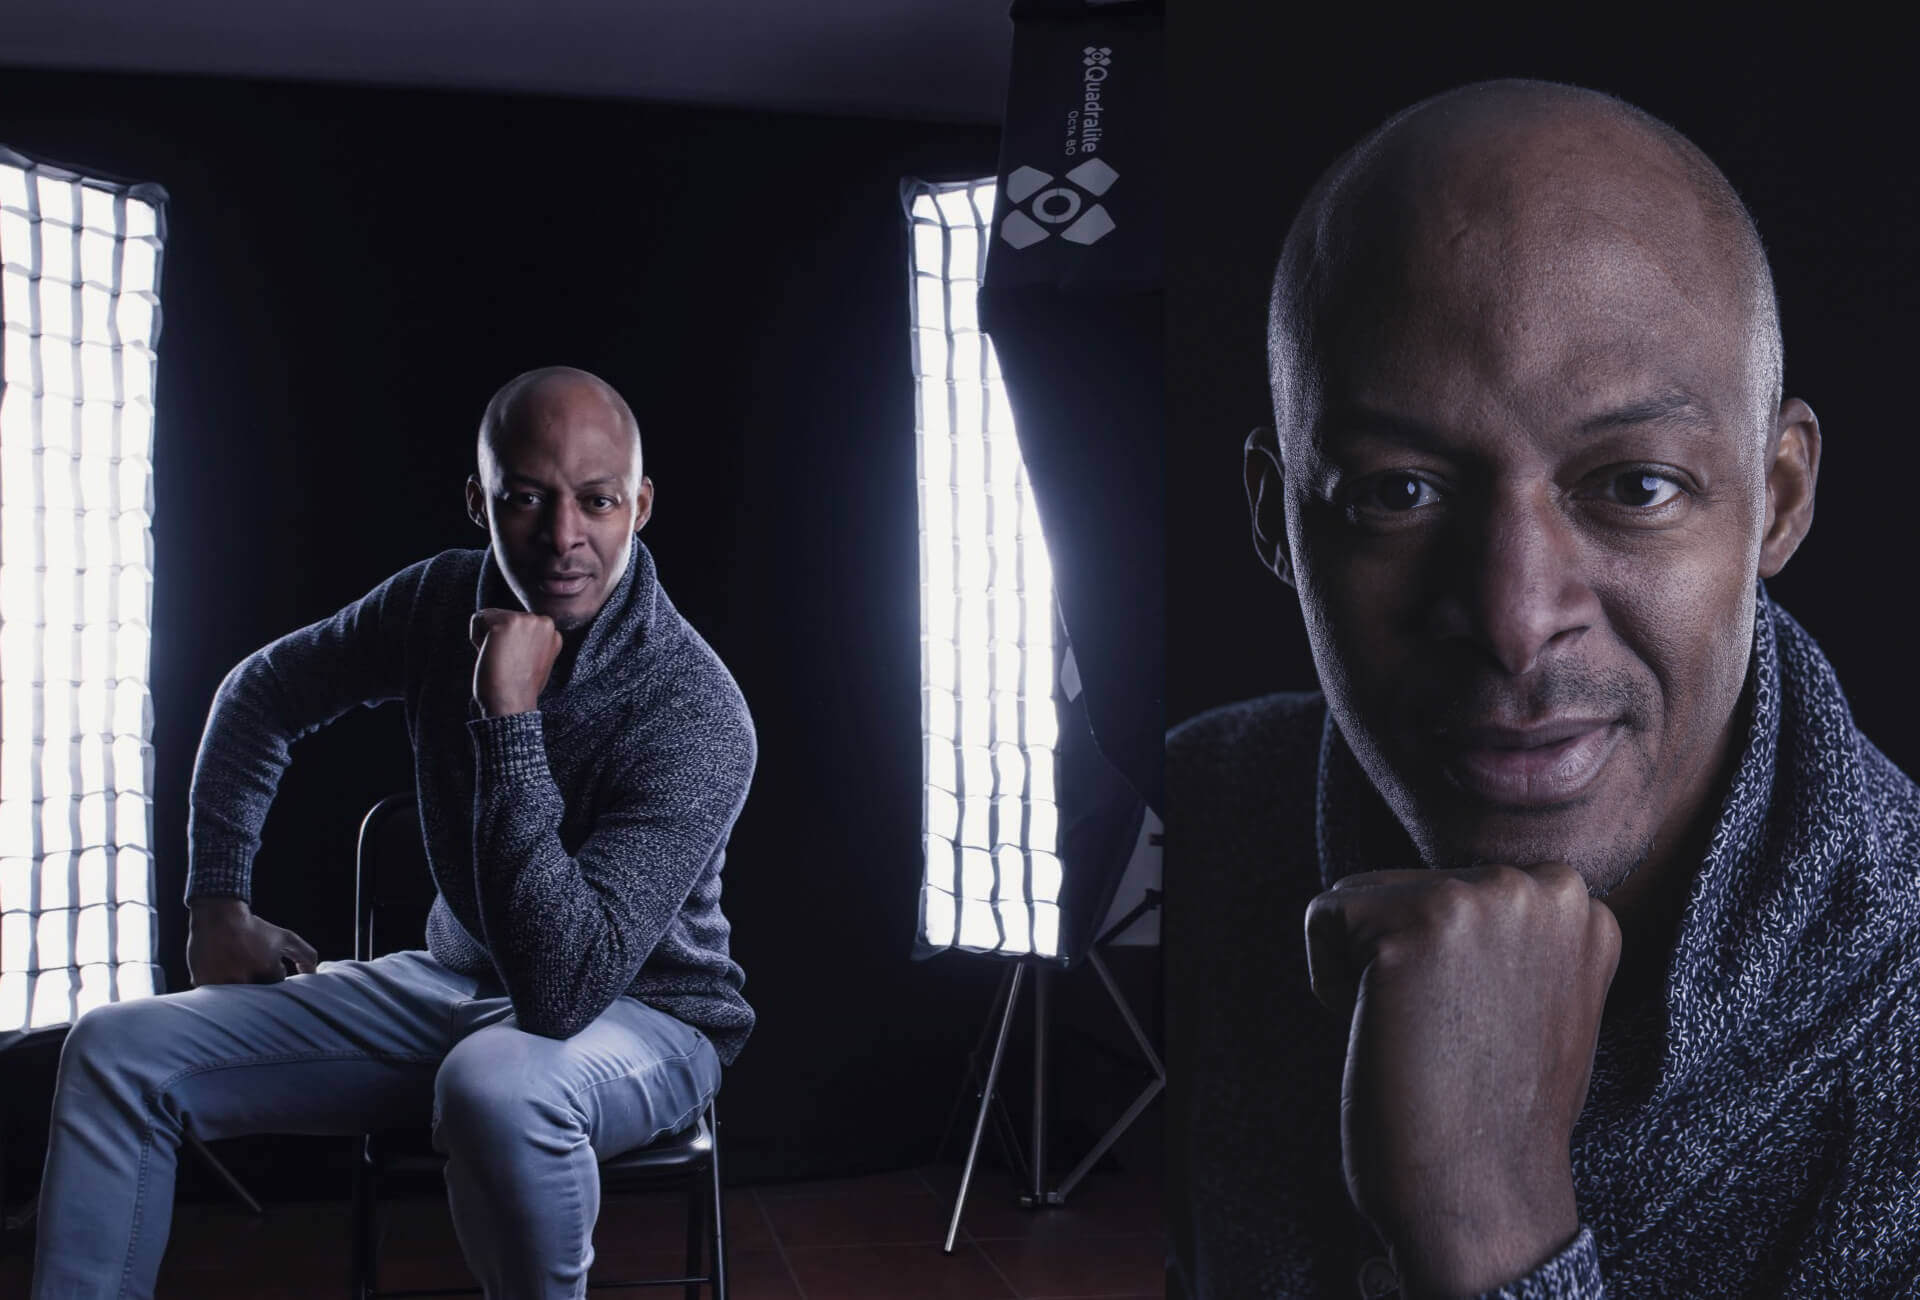
##### BUTTERFLY LIGHTING
With Butterfly lighting, the main source is positioned above and directly in front of the model. The camera is placed just below the source – in this case under the Octa. The name comes from the butterfly-shaped shadow formed beneath the model’s nose. The setup works both for full-length portraits and tighter crops.
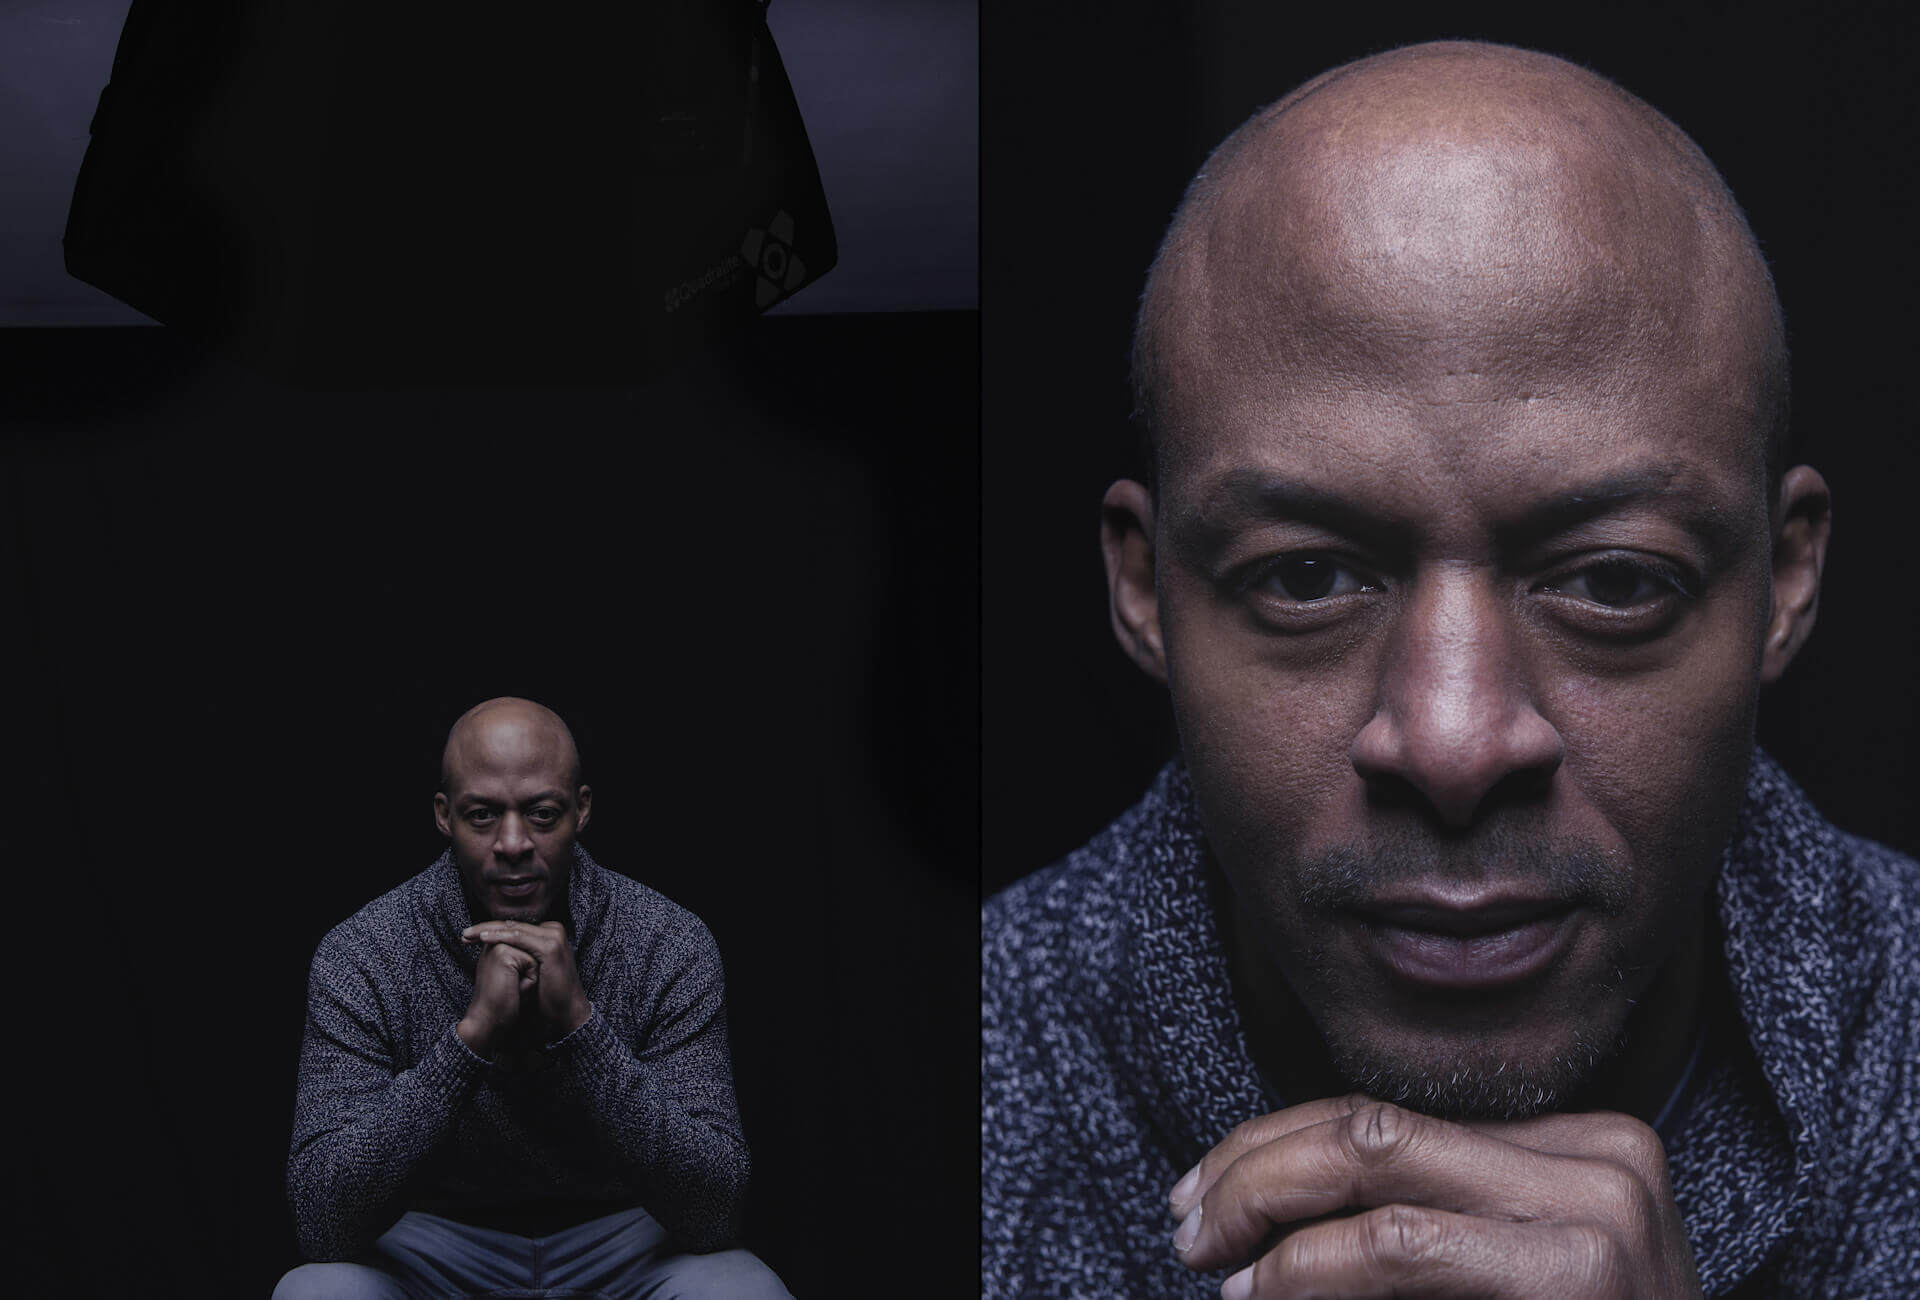
##### BUTTERFLY + TWO RIM LIGHTS
The previous setup can be expanded by adding rear-side rim lights on both sides of the model, helping to outline the figure.
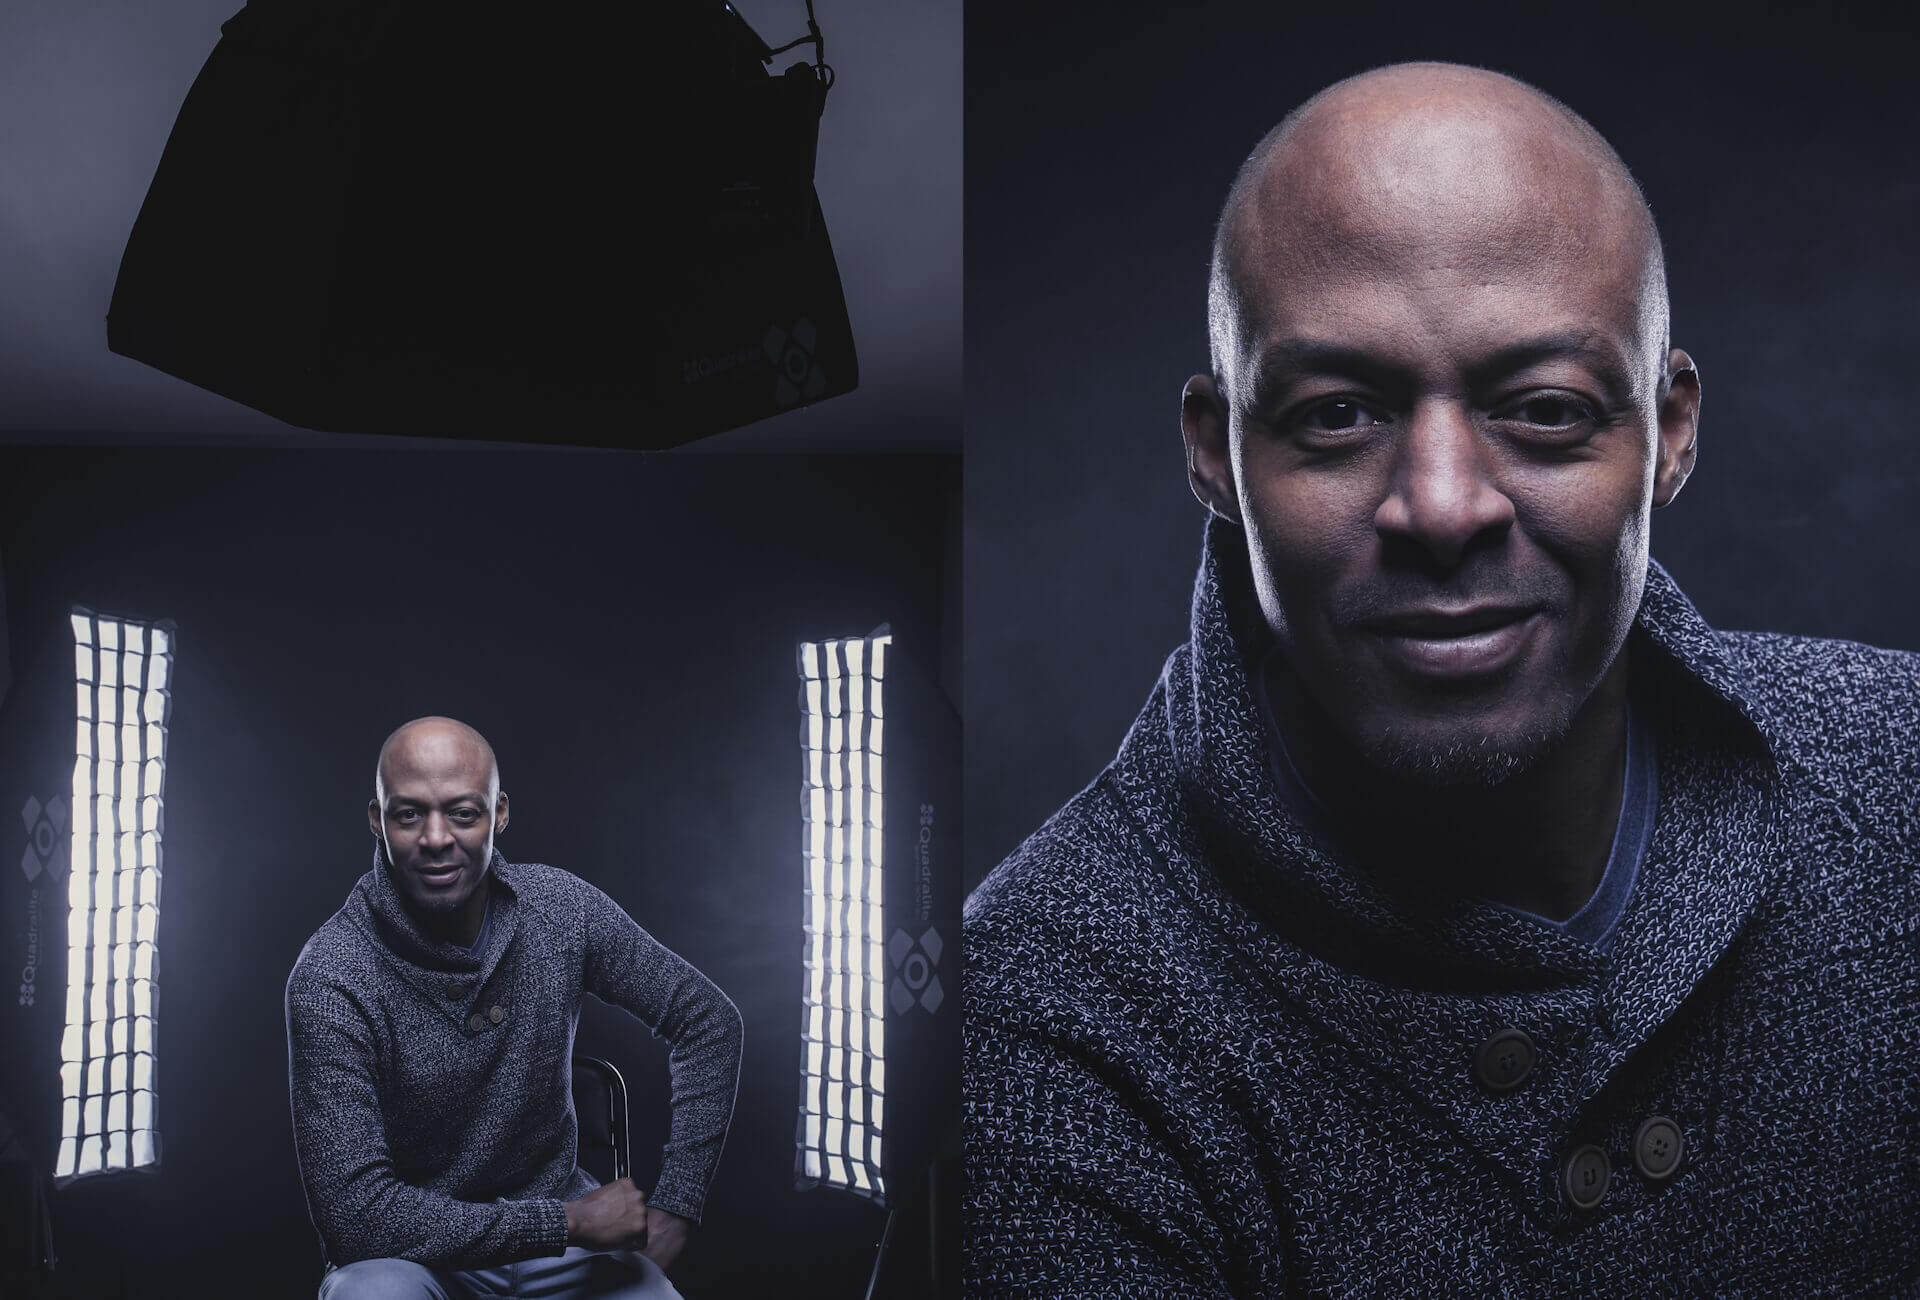
##### BUTTERFLY + ONE RIM LIGHT
When using only one rim light, it can be placed behind the model.
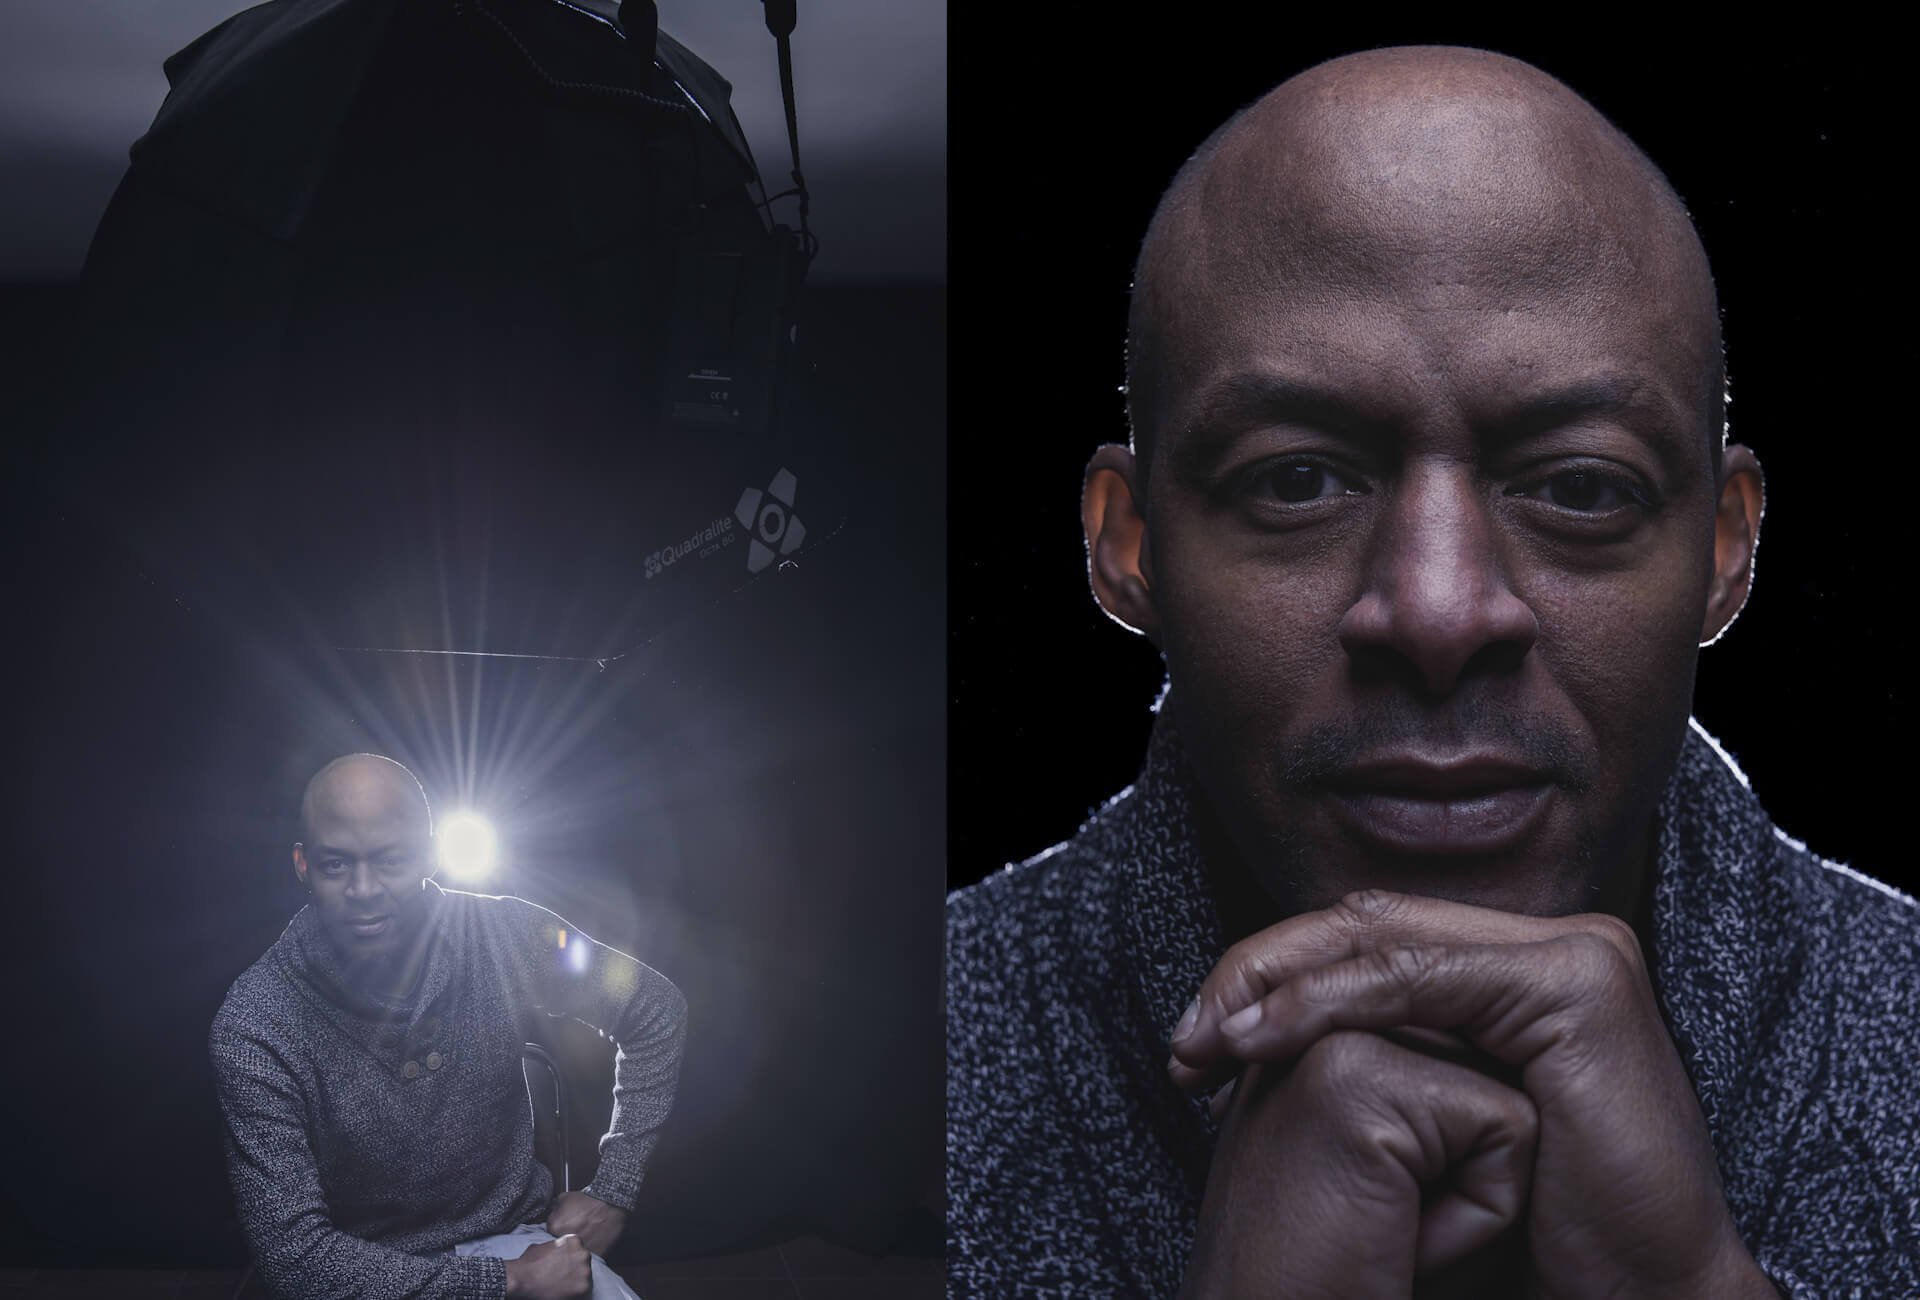
##### BUTTERFLY + REFLECTOR
If the overhead light creates shadows under the nose and eyes that are too strong, they can be softened with a reflector placed on the model’s lap. The reflected light also adds catchlights and brightens the eyes. This setup is often used for fashion and beauty portraits and can also help reduce the appearance of facial wrinkles.
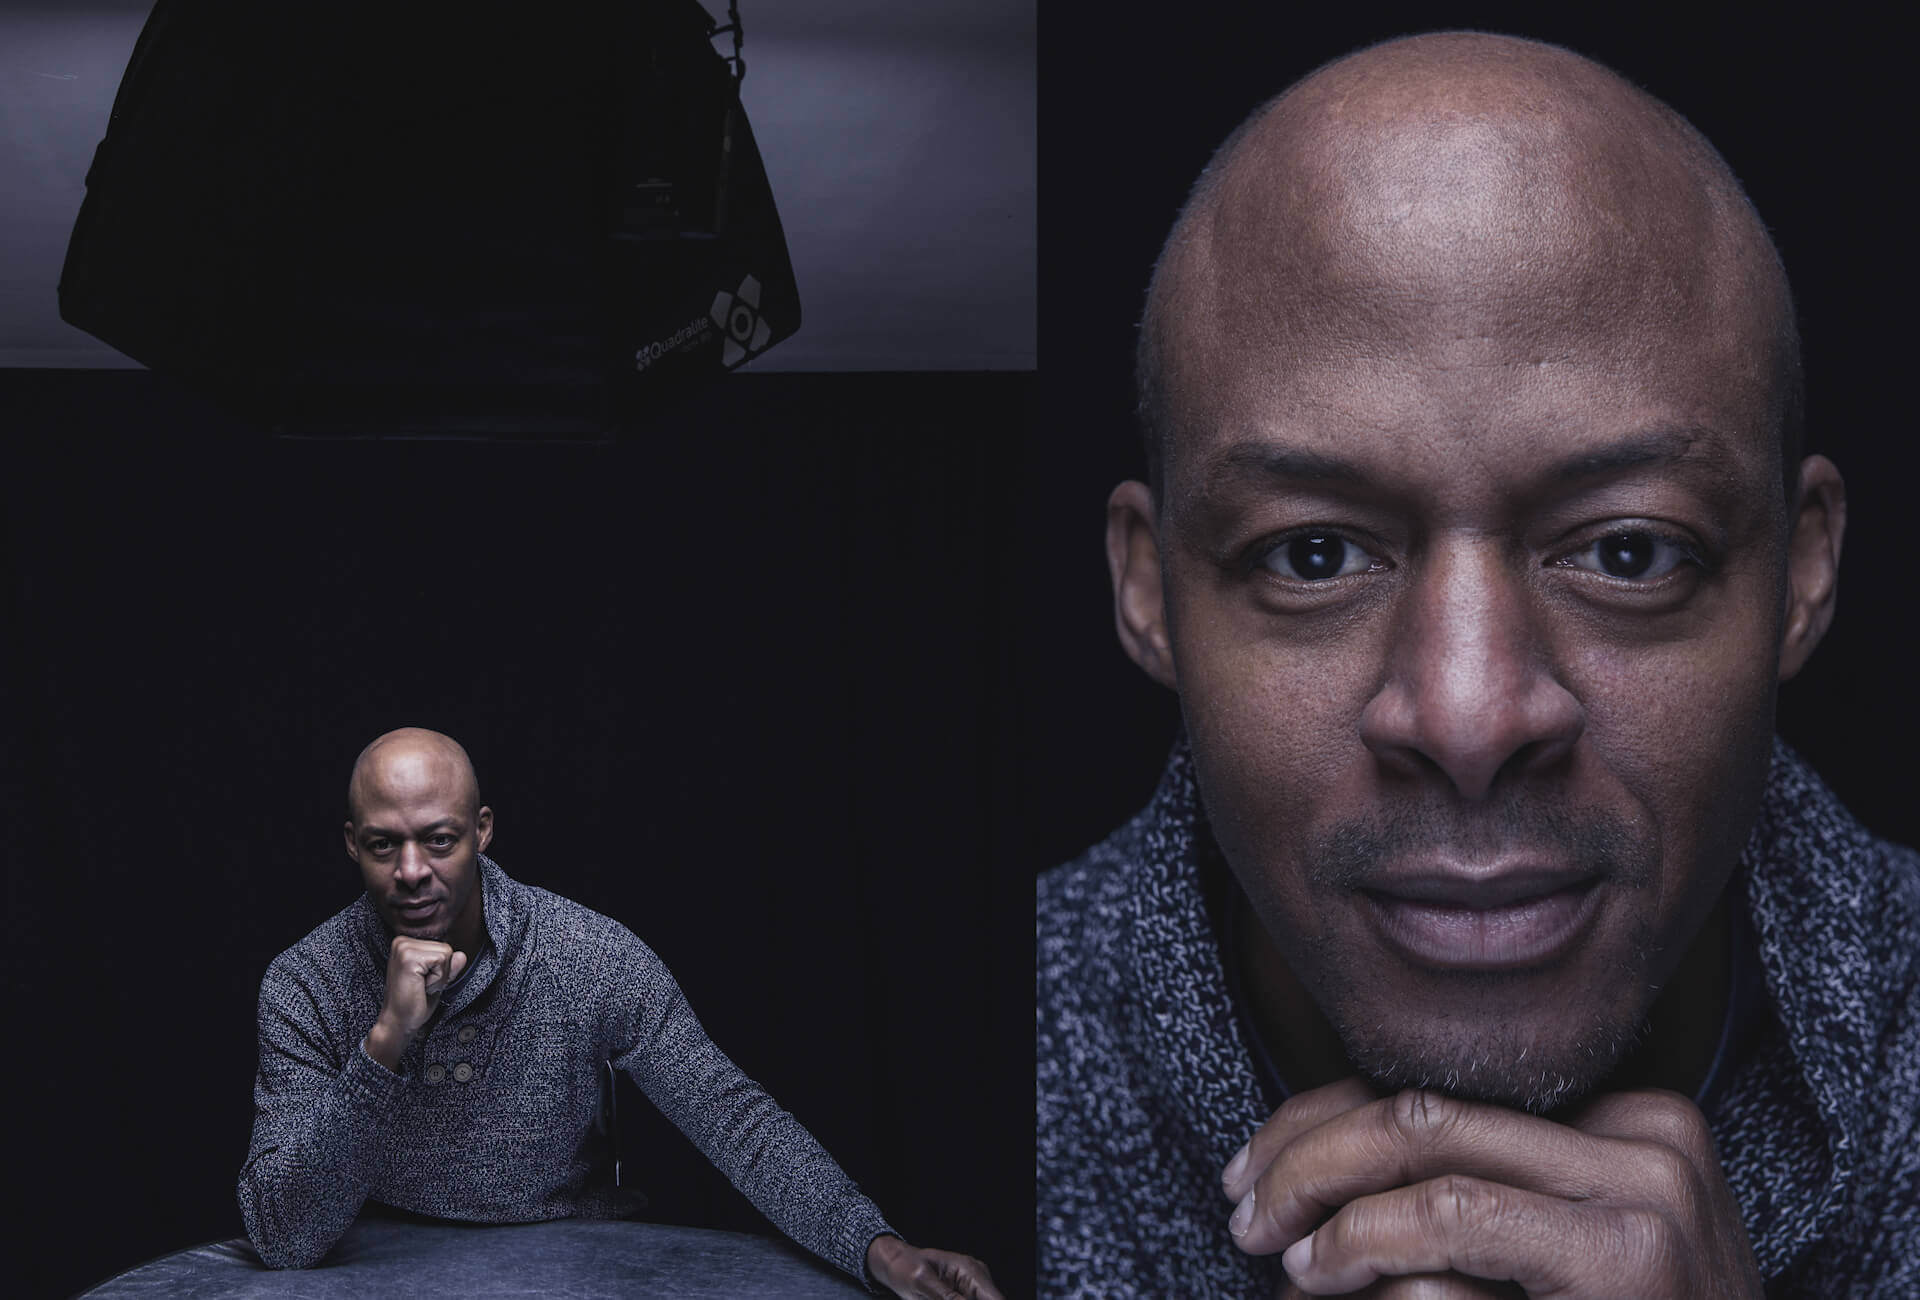
##### CLAMSHELL LIGHTING
As in the previous setup, the main source is placed above the model, but the reflector is replaced with a second light source. This gives greater control over the strength of the fill. Clamshell lighting is frequently used for fashion and beauty portraits.
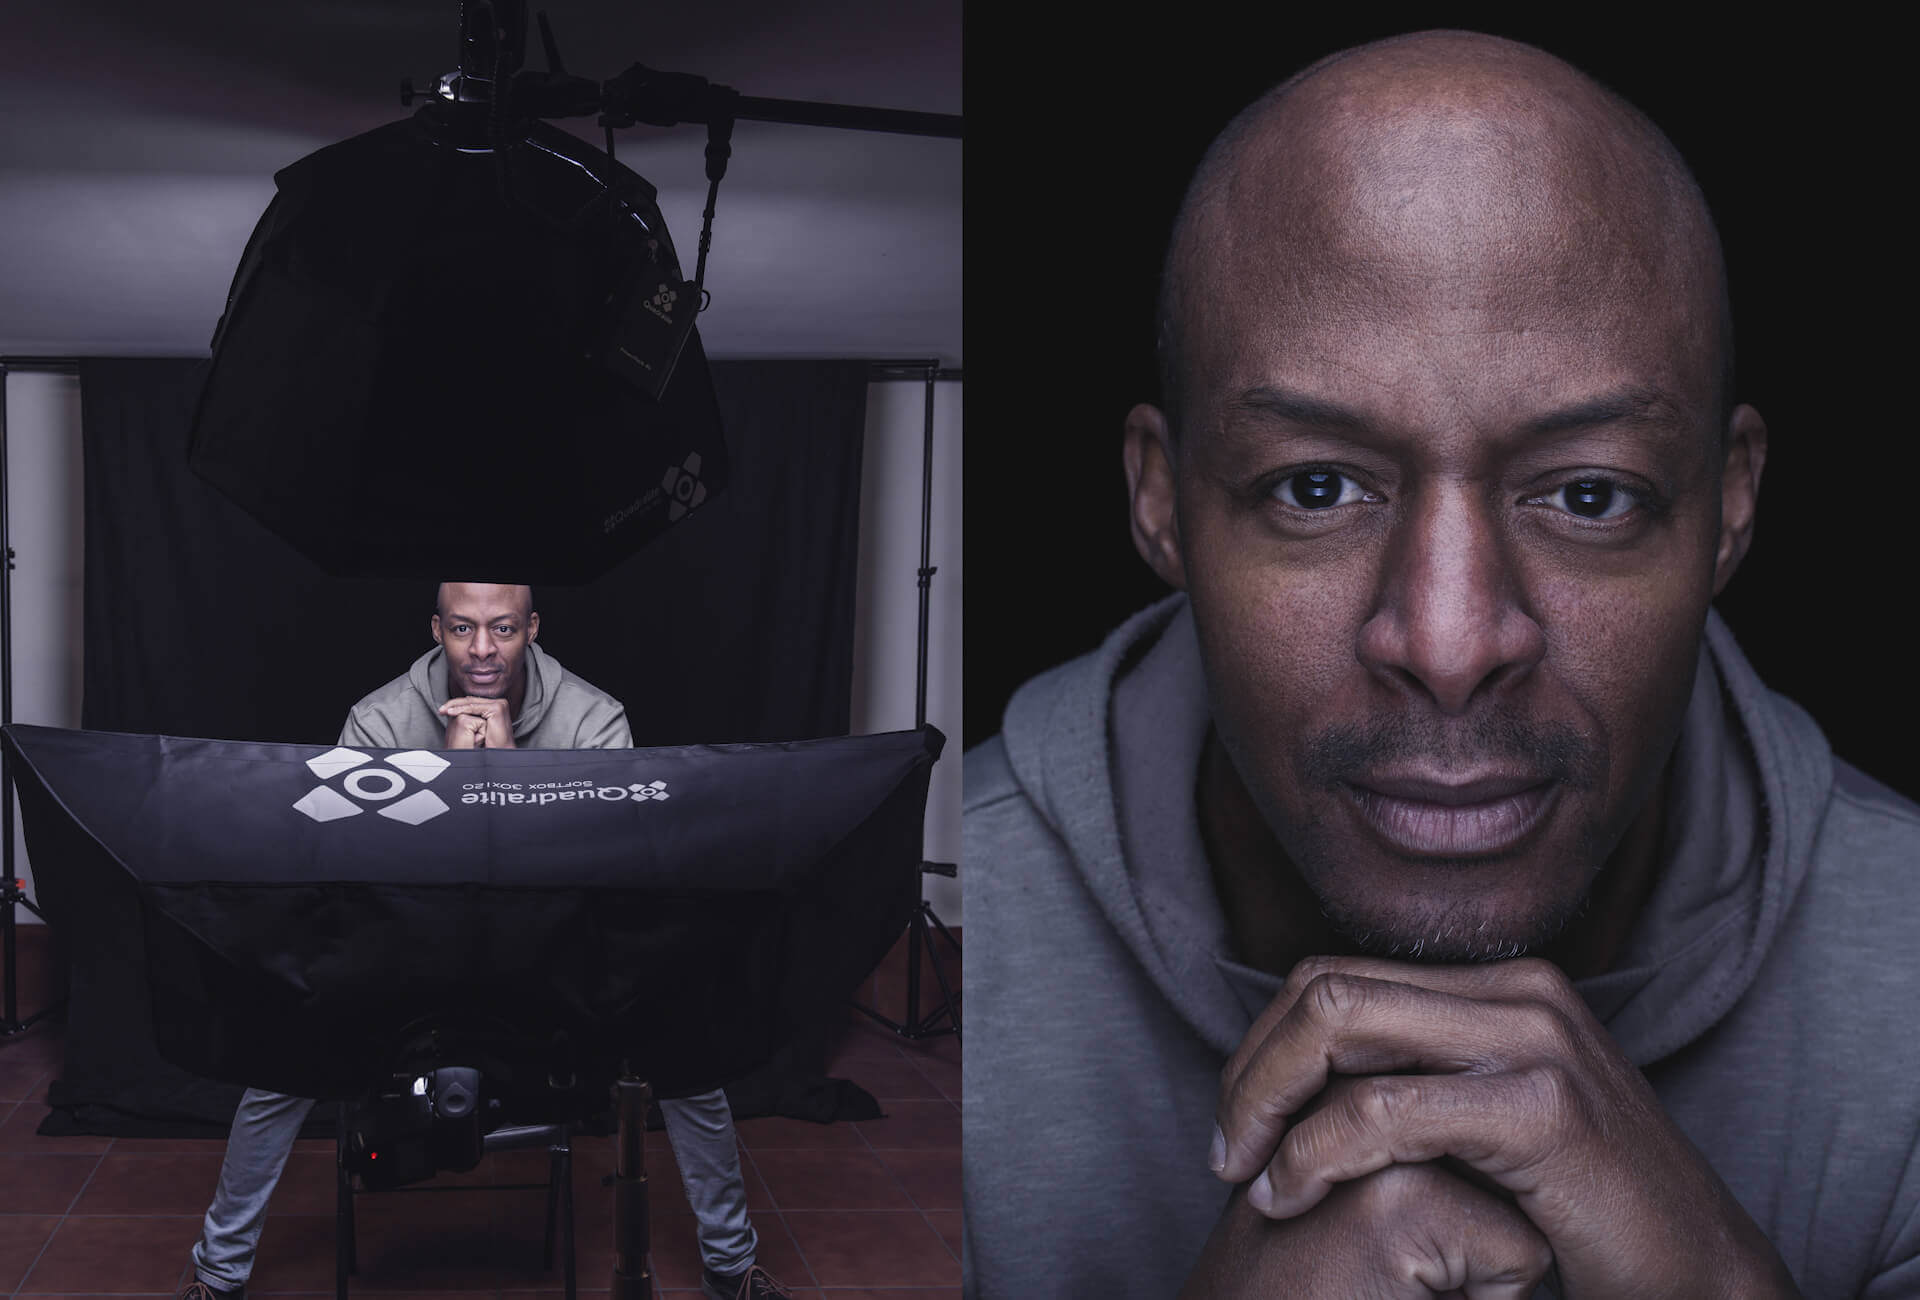
##### CLAMSHELL + RIM LIGHT
A rim light can be added to the previous setup to increase the three-dimensional effect and separate the model from the background.
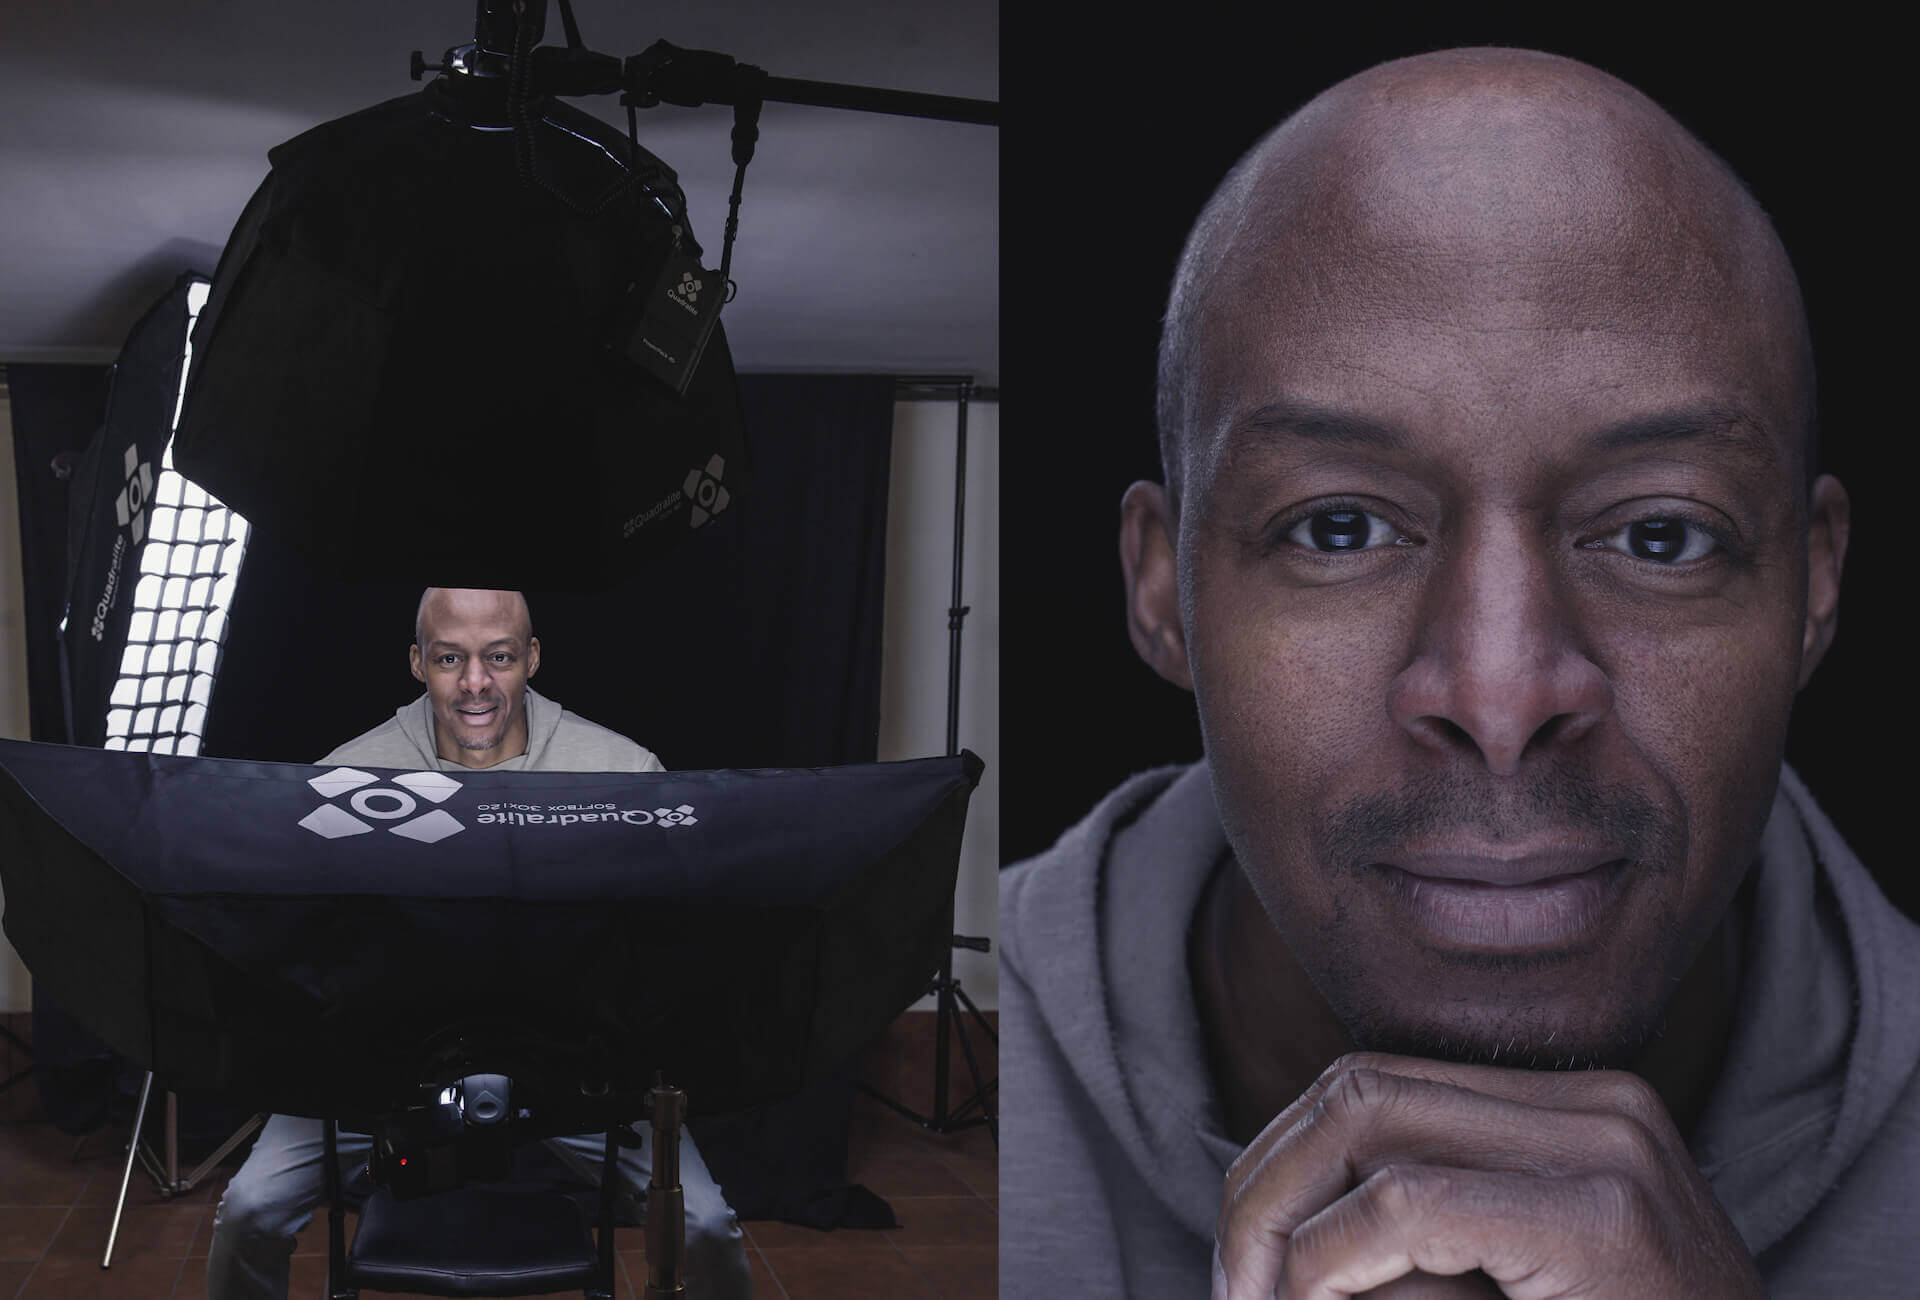
##### CLAMSHELL + BACKGROUND LIGHT
Do not be afraid to experiment with background lighting. The results can be very original, whether through the use of appropriate modifiers – a snoot in this case – or by adding colored gels.
##### SIDE LIGHTING
To finish, here is a setup in which I did not use an Octa. Two side lights are placed on either side of the model, emphasizing distinctive features while leaving the central part of the face darker.
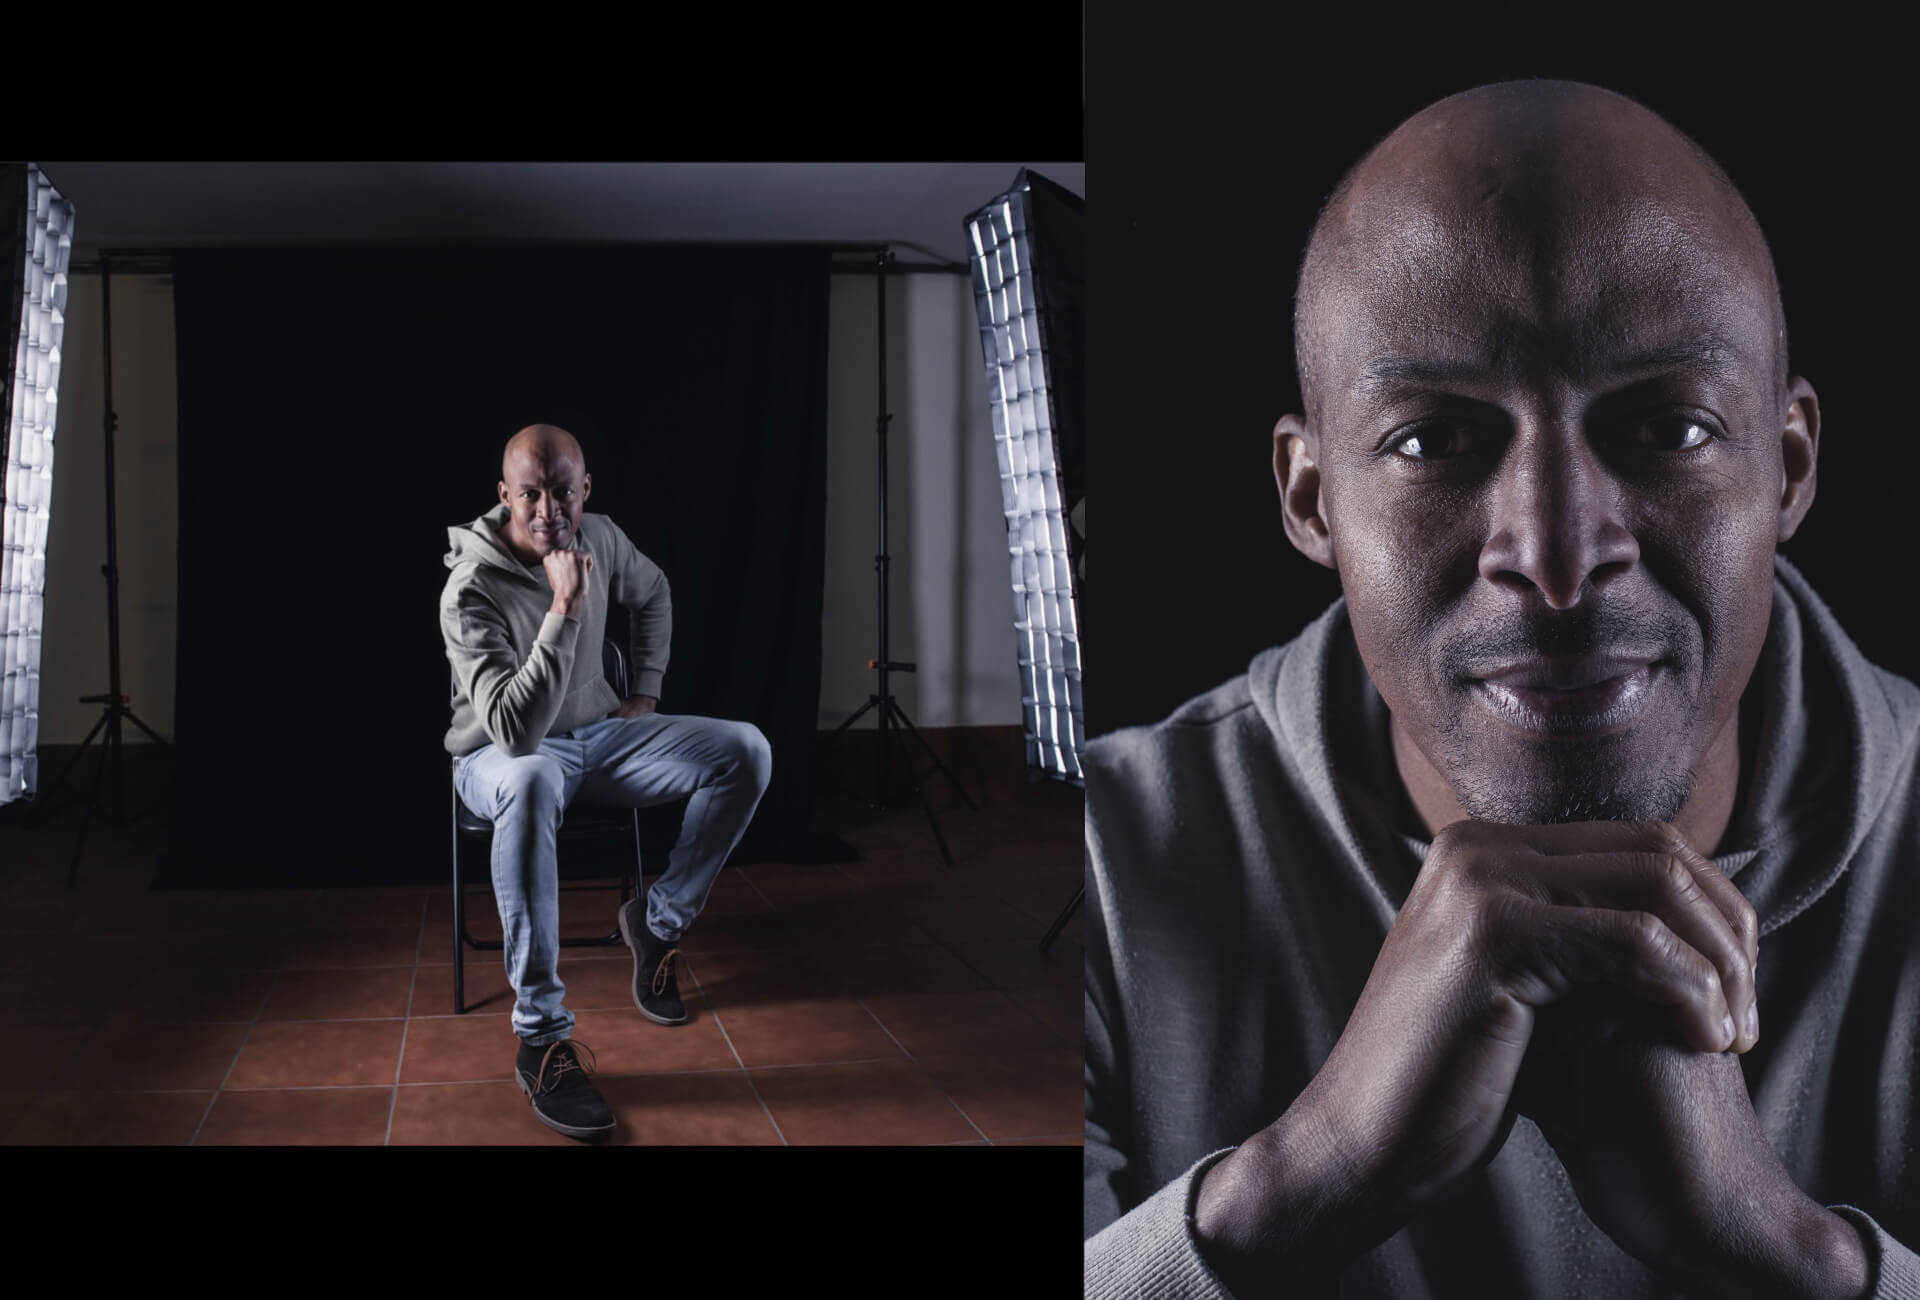
As you can see, the number of possibilities is limited only by our willingness to experiment with different positions and light sources. Everyone should adapt these ideas to their own needs and preferences, whether using flash or available window light.
Each lighting setup will also change depending on the model’s position relative to the lights. Personally, I like experimenting first with straight-on portraits and then changing poses to observe how the light falls on the model.
The key is to understand what effect a given setup can produce so that you can consciously decide how the final portrait should look.
Equipment used:
- Nikon D810,
- 50 mm f/1.4 and 24–70 mm f/2.8 lenses,
- main light: Quadralite Reporter 360 TTL,
- Quadralite Octa 80 cm softbox,
- Quadralite 30×120 cm rectangular softbox with grid.
Text and photographs: Alberto Duran
Model: Toni